Index
3.3 Camera projects
Creating a camera project
To create a new project, click the Create Camera Project button in the project dashboard under the camera tab. You must be the administrator of at least one organization within WildTrax in order to create a project.
The following information can be added to the new project:
- Project Title: The full title defined by the user to identify the project.
- Organization: Drop-down list of all existing organizations of which you are an admin. This field allows you to group all of your projects together in the database. Once your project is saved you will be unable to change the organization to which it belongs.
- Year: The year the data was collected.
- Due Date: The anticipated processing completion date. Your taggers can use this as a guideline as to when their image sets are due.
- Data Source: If you are importing data from an outside source (e.g. previously tagged data), please specify the original source of the data.
- Description: This field allows you to outline the purpose, goals, objectives, and methods of your project.
- Status: See more in project publication
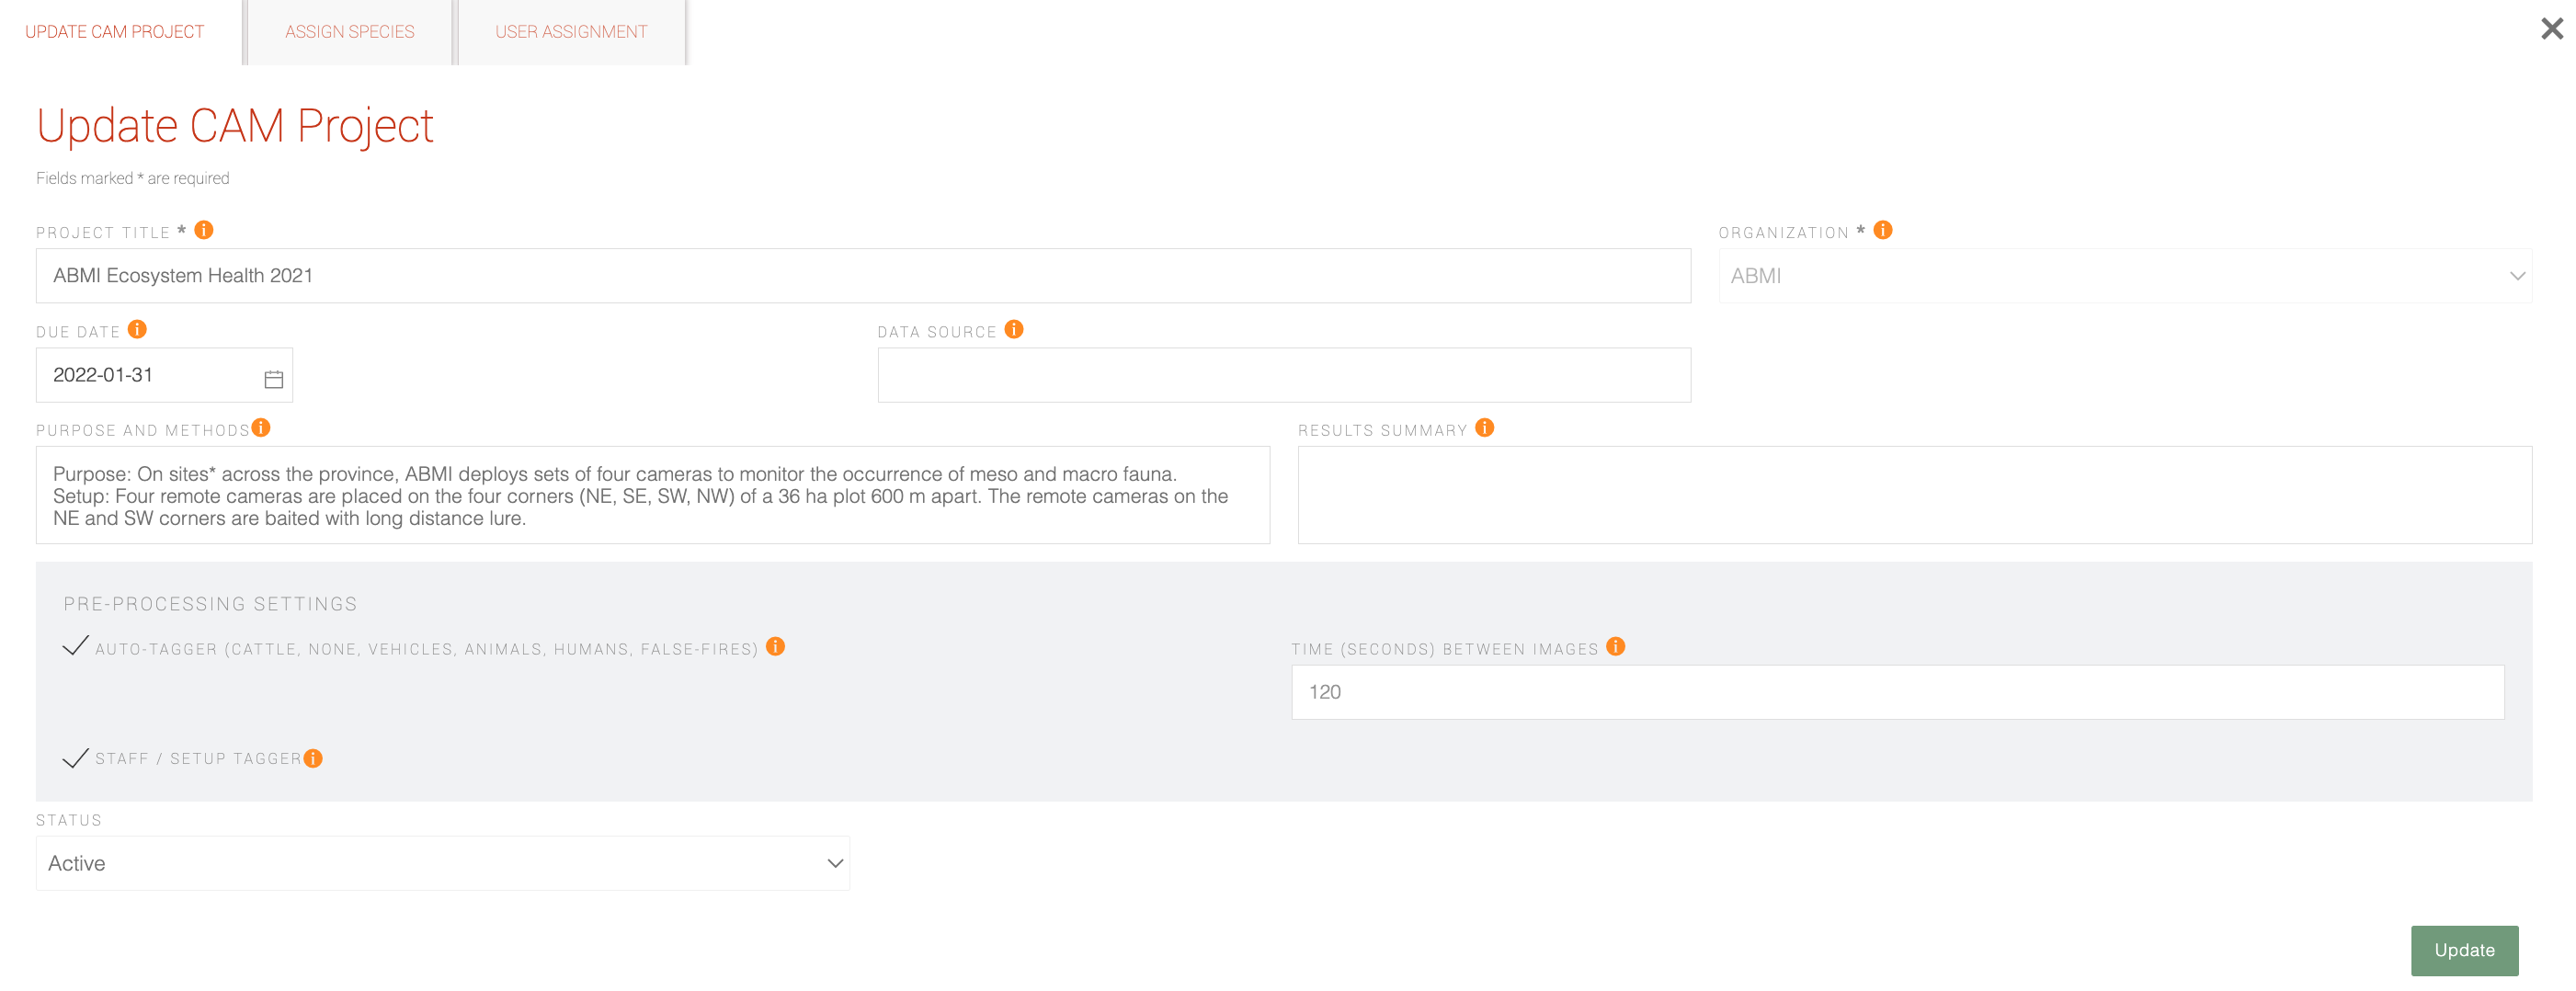
- Auto-tagger (Megadetector, cow): Computer-based tools that tag, hide and blur human images from further assessment based on machine-learning techniques. The auto-tagger currently identifies vehicles, humans, animals, nones (including false-fires) and images of domestic cattle.
- Staff/Setup tagger: All images within the first and last 120 minutes of a deployment are automatically tagged as STAFF/SETUP, unless there are <6 images, <2 images auto-tagged as human, and STAFF/SETUP are already tagged in the first and last 120 minutes.
- Time between images (seconds): This is the time between consecutive images that defines a break, or the start of a new series of images. You can modify this number to suit your needs at any time.

3.3.1.3 Adding users to your project
Once you save your project details, you will be able to manage your users. Select the  tab to add and view current administrator and read-only project members.
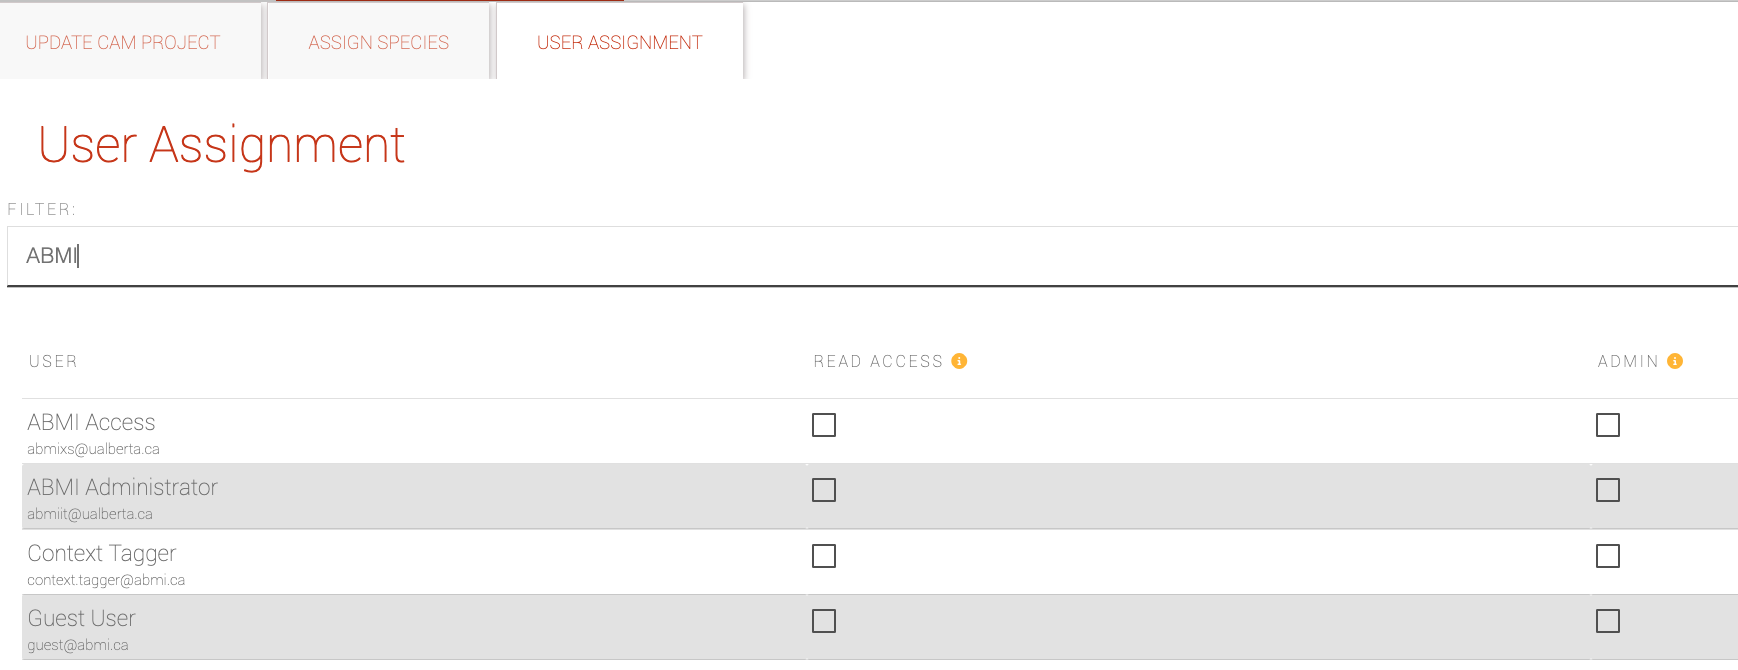
- Project administrators have both read and write access to the project details, settings. They can add users to the project and can assign taggers to image sets.
- Project read-only members can view project details, and settings, and all image sets within the project. However, they can only edit image sets assigned to them.
Once you have created your project and close the window, the new project will be visible in the camera project list. Click on the project title to enter the project page or click  to edit project details, settings or users.
3.3.2 Uploading image sets
Within each project page, tasks can be created by batch uploading camera trap image sets, which are associated with location. Before uploading, image data should be organized into folders on a computer or hard drive. Image file names do not need to be changed because they are sorted by data/time stamps in WildTrax. The folders containing images for uploading should be named with a unique location that will appear in the location list once uploading is complete. The unique location name should not have any spaces, but special characters are allowed (e.g. 2234-SW; CAL-1_A).
To upload image sets:
- Click on
 and then the
  option to begin the process of uploading photos to WildTrax.
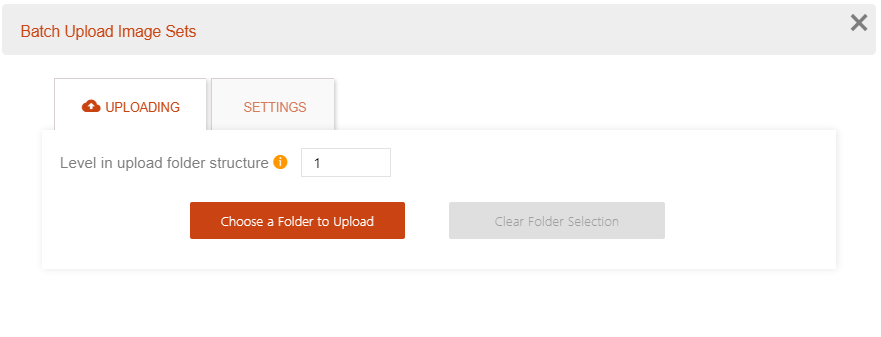
- If you are uploading a single image set, leave the “Level in upload folder structure” set to 1. If you are uploading more than one image set, nested within another folder such as year, change the base level to 2 and select the folder that is one level up from the folders containing your image sets.
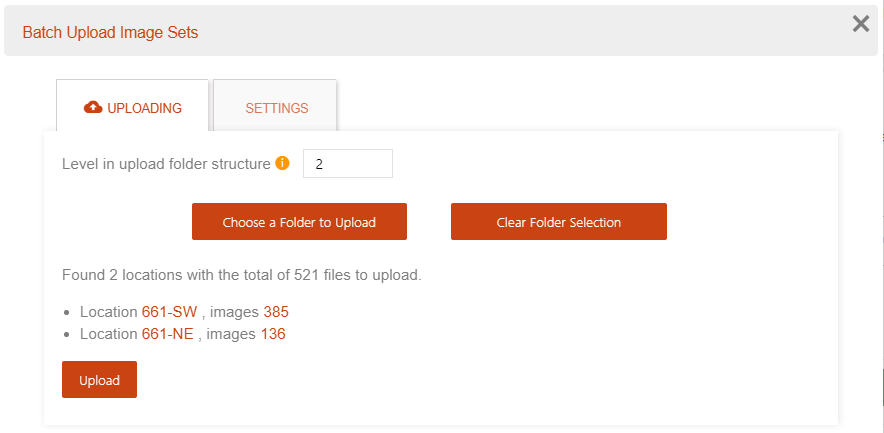
- Click “Choose a Folder to Upload” to select image sets from your computer or hard drive. Browse to the folder or folders with the images you want to upload and select. This folder will either contain a single image set, or subfolders with various image sets. Click “Upload” and confirm that you would like to upload images to WildTrax.
- Before committing to the upload ensure that that the selected folder is correct by checking the locations that are listed to be uploaded, and the number of images associated with each location
- Files will upload in the background and a green check mark will appear next to successfully uploaded folders. If images have been skipped, you can re-upload those files by clicking on “Upload Failed Images.”
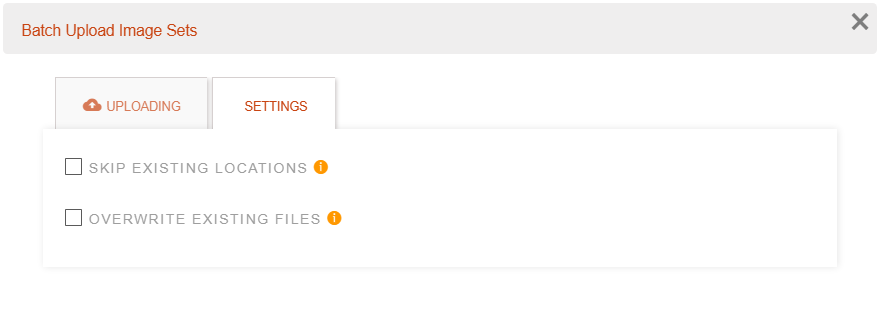
- Advanced upload settings can be implemented if you need to skip already uploaded locations or overwrite existing files.
- Skip Existing Locations: This setting speeds up the overall upload time by first testing whether a location exists, and then skipping locations with the same name that already exist in the project you are uploading to. Use this setting if a number of locations from the upload folder have already been uploaded to the current WildTrax project and you are certain that those deployments are complete.
- Overwrite Existing Files: Simply put, this function allows you to reupload a location, and replace all previously existing images. This is generally used when an error occurs in the original upload.
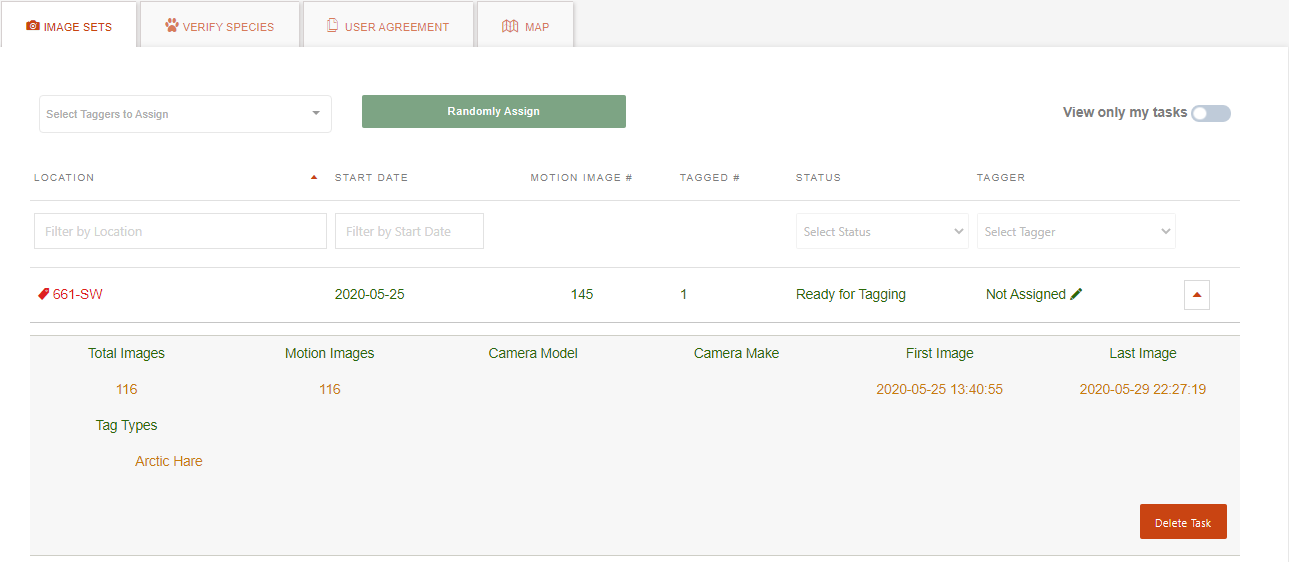
When uploading is complete, the newly uploaded image sets will appear in the list under Location. At this stage, the status of these tasks will either be “Ready for Tagging” or “Processing” depending on your project settings. The list of tasks can be filtered by location name, start date, motion image number, tagged number, status, or by assigned observer.
3.3.3 Task management
You can also easily delete tasks regardless of their status. To delete a camera task, click the drop down arrow next to the tagger assignment pencil in the image set list, and click the  button.
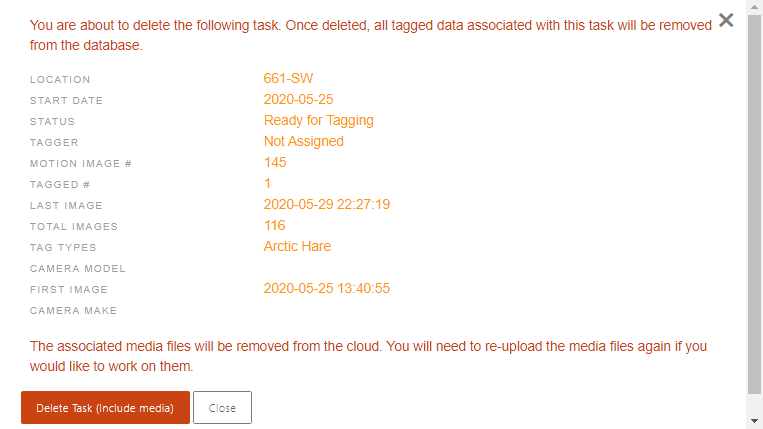
A window will appear with the task details and you will have to confirm the deletion.
Deleting a task will delete the entire image set from the cloud and any associated tags from the database. These actions cannot be undone.
3.3.4 Auto-tagging
WildTrax's auto-tagging features allow you to save time reviewing camera trap images by applying tags to images before you begin tagging. The auto-tagger is built on multiple machine learning approaches, with the principal component being Microsoft's Megadetector. The goal of Megadetector is to detect animals, people, and vehicles in camera trap images. It does not identify animals, it just finds them. WildTrax's own enhancements allow you to also find false-fires, staff and setup photos as well as a customized artificial intelligence designed to find cattle.

In order to use the auto-taggers, select either of the choices in the project's settings. Once you've done this, any data that you upload into the project will run through them before they become available for tagging. This will be reflected in the image set / task status and follows the path of:
Uploading -> Ready for auto-tagger -> Processing -> Preparing -> Ready for tagging -> Tagging complete
- Uploading: The image set is being uploaded to the server
- Ready for auto-tagger: The image set has been prepared for the auto-taggers; a WildTrax administrator will receive a notification to process the auto-taggers
- Processing: The Megadetector AI is being applied to the image set returning results of vehicle, humans, animals and false-fires.
- Preparing: The staff-setup taggers and blurring are being applied to the image set returning blurred images of humans and filtering images of the deployment and retrieval of the camera.
- Ready for tagging: The image set is ready to be processed; this is the status of the image set after the processing and preparing phases if you selected the auto-tagger options for your project.
- Tagging Complete: Once all images have been tagged and the camera field of view review has been completed, the image set can be set to tagging complete.
3.3.5 Tag management
The  button also contains functions that allow you to upload and download tags to and from a project. This is useful if you've ever tagged image data in another database and wish to sync it to WildTrax standard.
Here are the csv fields required in order to upload - if you're project doesn't contain any tags, you'll be able to download a template first.
- Location: The location of the camera
- Deployment date: The deployment date of the camera
- Retrieval date: The retrieval date of the camera
- Serial number: The serial number of the camera that took the image
- File name: The filename of the image
- Image date: The date the image was taken (YYYY-MM-DD)
- Image sequence: E.g. 1 of 1 or 1 of 3
- Species: The species of the tagged animal - see the Glossary for a list of supported species code
- Sex: The sex of the tagged animal
- Age: The age of the tagged animal
- Count: The number of individuals tagged
- Needs review: Whether the tag requires review
- Is verified: Whether the tag was verified by another observer
3.3.6 Assigning taggers
Taggers can be assigned both randomly and manually by the project or organization administrator(s). If you choose to assign tasks randomly, unassigned tasks are proportionally distributed among your selected taggers. When assigning taggers to tasks, the selection list will be comprised of users that have been added to the project (see Adding users to your project). The project administrator(s) can also assign themselves as taggers to tasks.
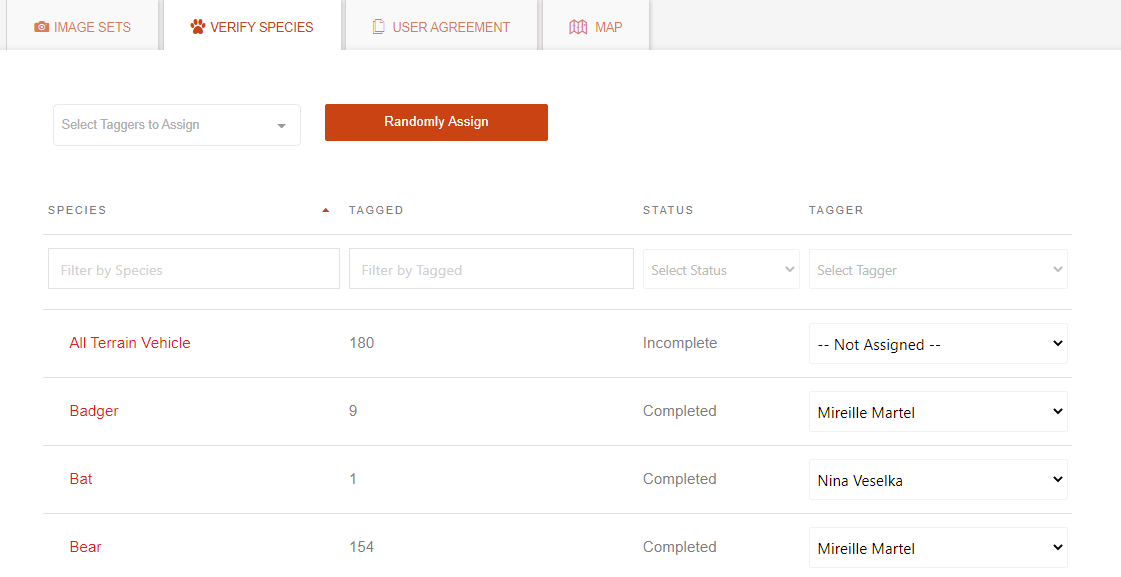
3.3.7 Species tab
After tagging is complete, a second check of species identification is completed to catch and correct tagging errors. It is easy to select incorrect tags from the drop down lists, so this step is important both for double-checking species identifications and for correcting data entry mistakes. In the  tab within the project page the project administrator can assign species tags to individual taggers:
- For each species listed, select a tagger’s name from the user drop-down menu to assign that species to a tagger for verification or select the project members you want to randomly assign across all species groups identified.
- Once a species has been verified, its status will turn to “Completed”.
See species verification for additional information.