Index
2.3 Visits
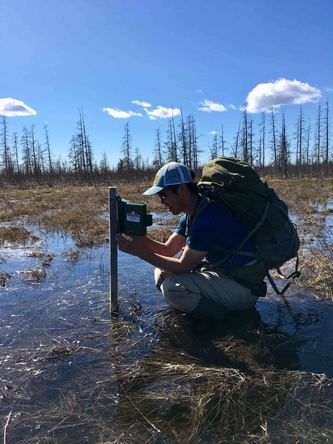
A visit is when an observer has gone to a location to collect environmental sensor or biological data.
WildTrax supports a variety of visit metadata and uses an integrated approach based on feedback from major WildTrax users. The goal is to provide ways of standardizing field metadata collection so that it can be easily shared with other organizations or WildTrax users. You can request additional functions or features by contacting WildTrax Support.
-
Why are visits important?
- Visit metadata provides quality control for environmental sensor media and metadata collected at the location
- Visits relate field activities on the landscape to equipment, media and biological data
- Visits record general information about the landscape where the environmental sensor was placed or the biological data collected
-
Do I need to collect visit data?
Visit metadata is not a requirement however you will not be able to upload visit images or equipment metadata without a visit.
-
What visit data is supported in WildTrax?
Two major activities can take place during a visit: using an environmental sensor or conducting a point count.
WildTrax currently supports the addition of general landscape information, visit images and sensor and equipment inventory information
Basic visit functionalities
Here are some steps to try if you want to begin using visits in WildTrax:
-
Creating visits
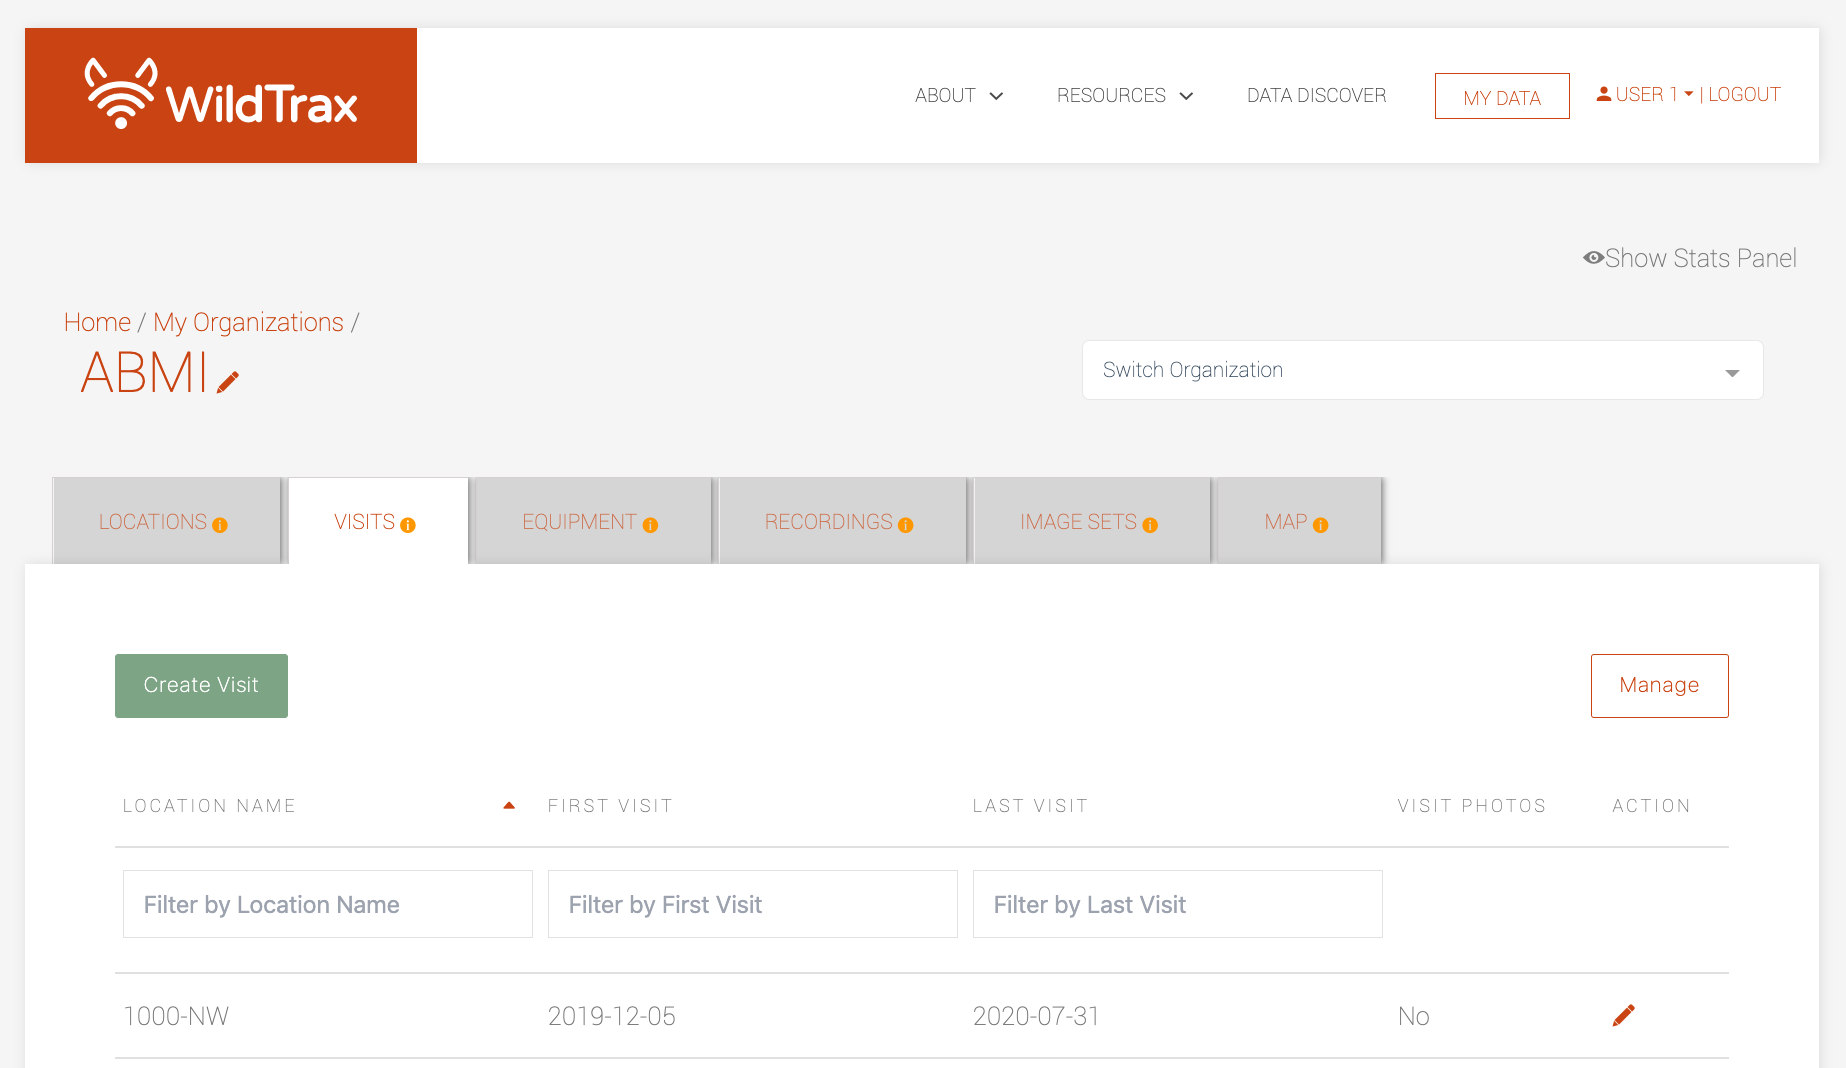
To create a visit:
- Go to the
 tab in the organization.
 - Click

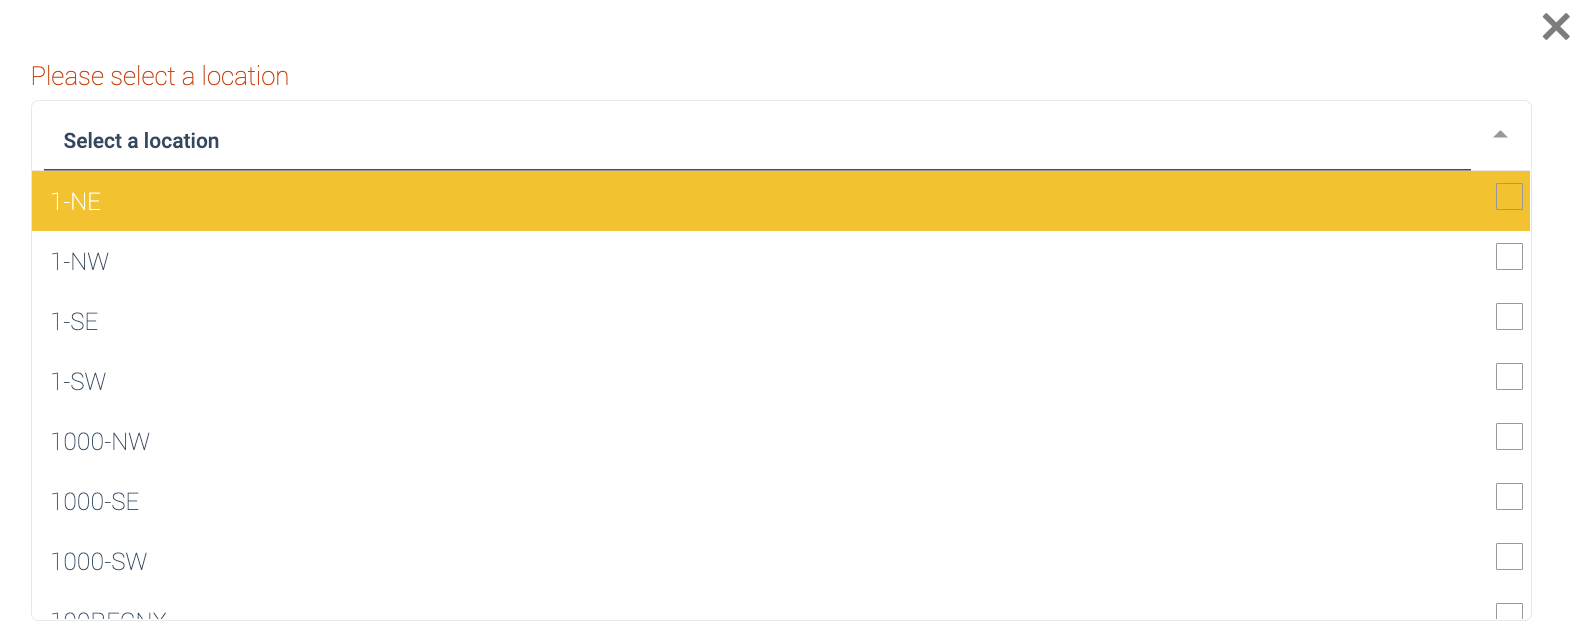
- Select or search for the location from the list in the table.
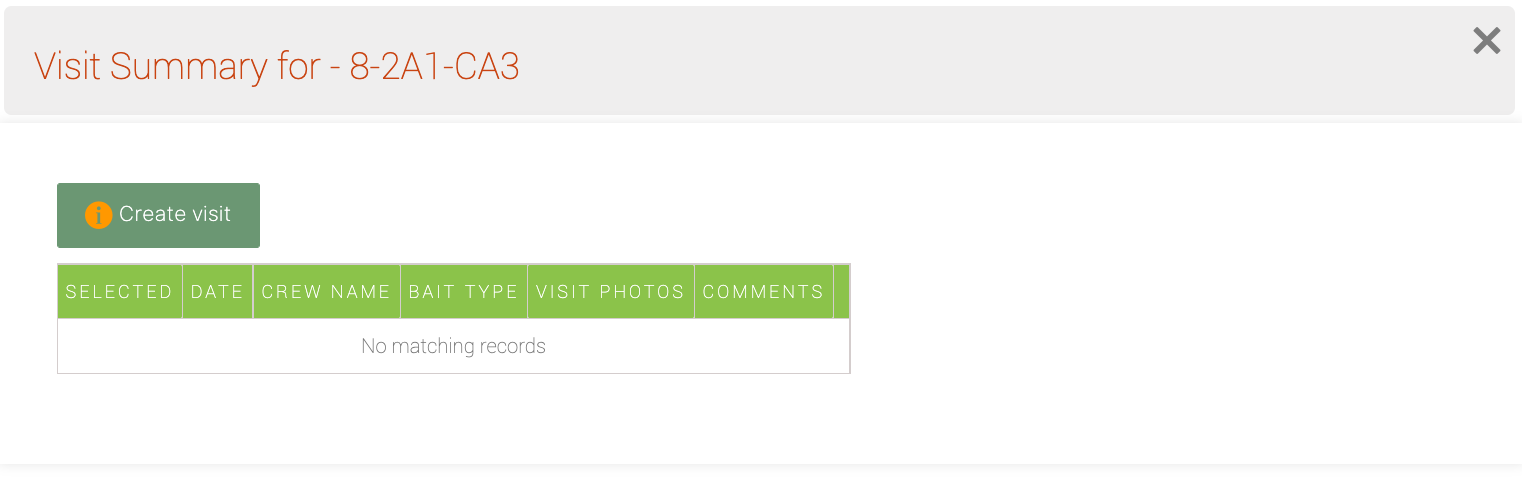
- Once you've done this, the visit summary form will appear: a comprehensive list of all visits and equipment for that location.
- Click on
- Enter the visit date in the visit form
- Click
 after which the visit images tab will appear and the
  button will turn green and allow you to begin adding other metadata to the visit
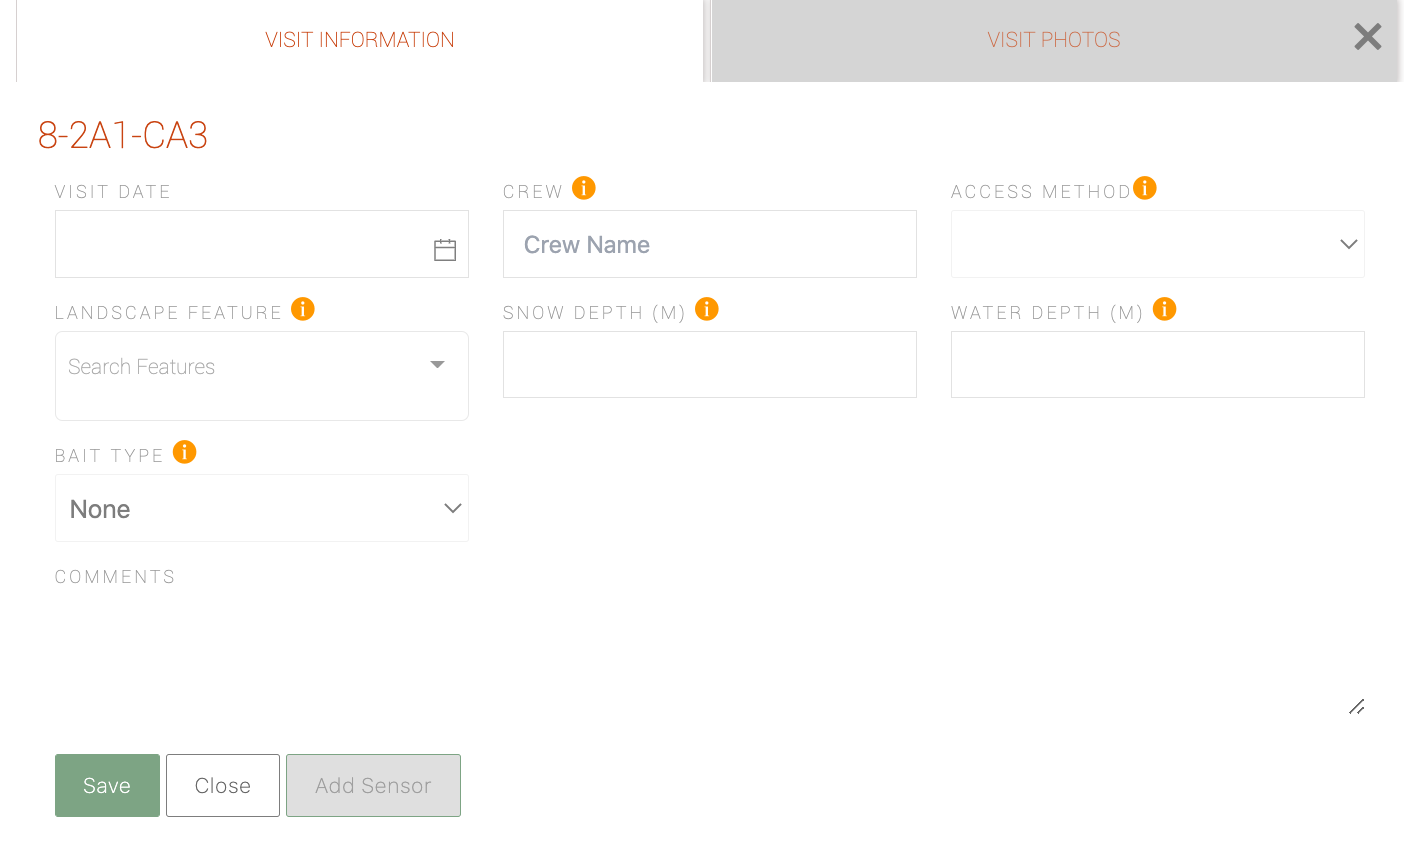
You only need to enter a date in order to create a visit; the rest of the values are optional.
- Go to the
-
Adding visit images
WildTrax has the ability to upload photos for every unique visit you make. Once you create a visit, the visit images tab will appear, allowing you to upload either a folder of images or a single file.
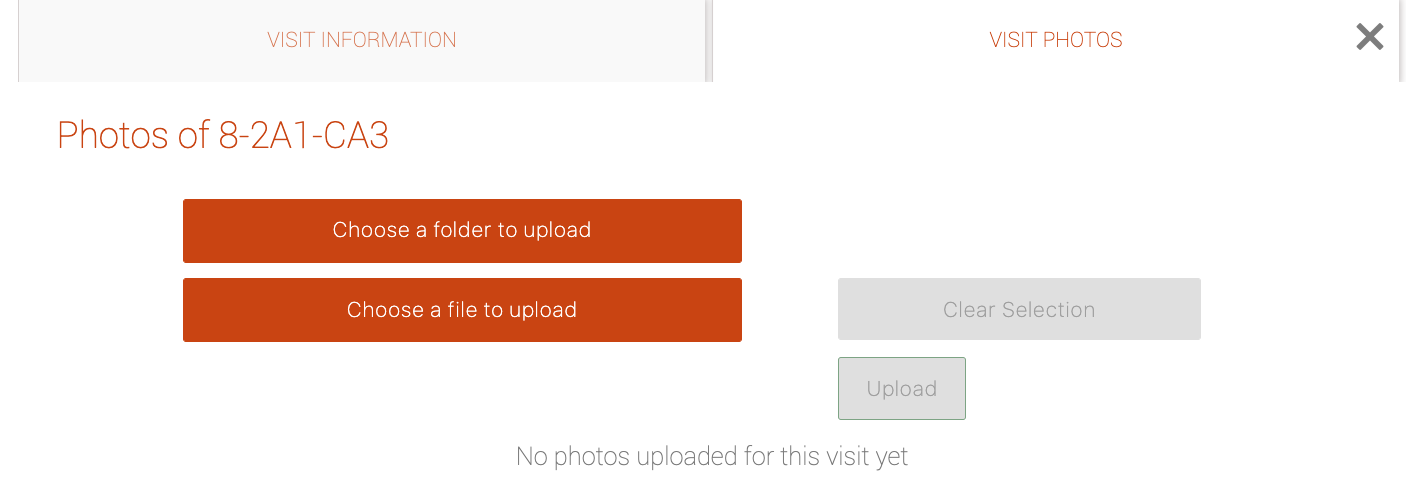
To upload visit images to WildTrax:
- Select your images and click
 within a visit form. Your images will be appended in
 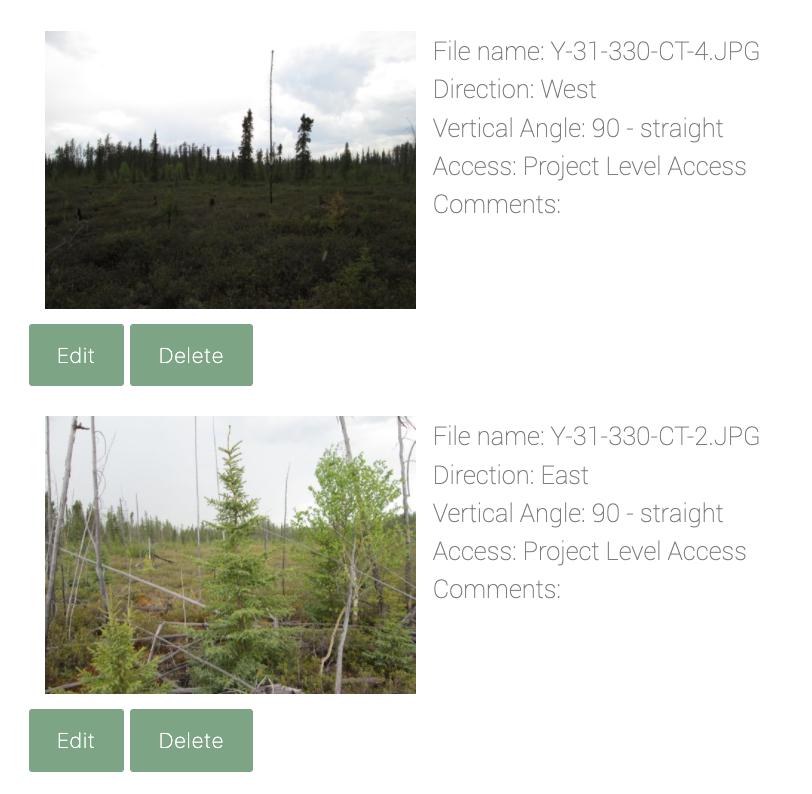 order down the page with the name of the image being taken from the file name.
- You can click either on
 to add more attribute information to the images or
  to remove it altogether.
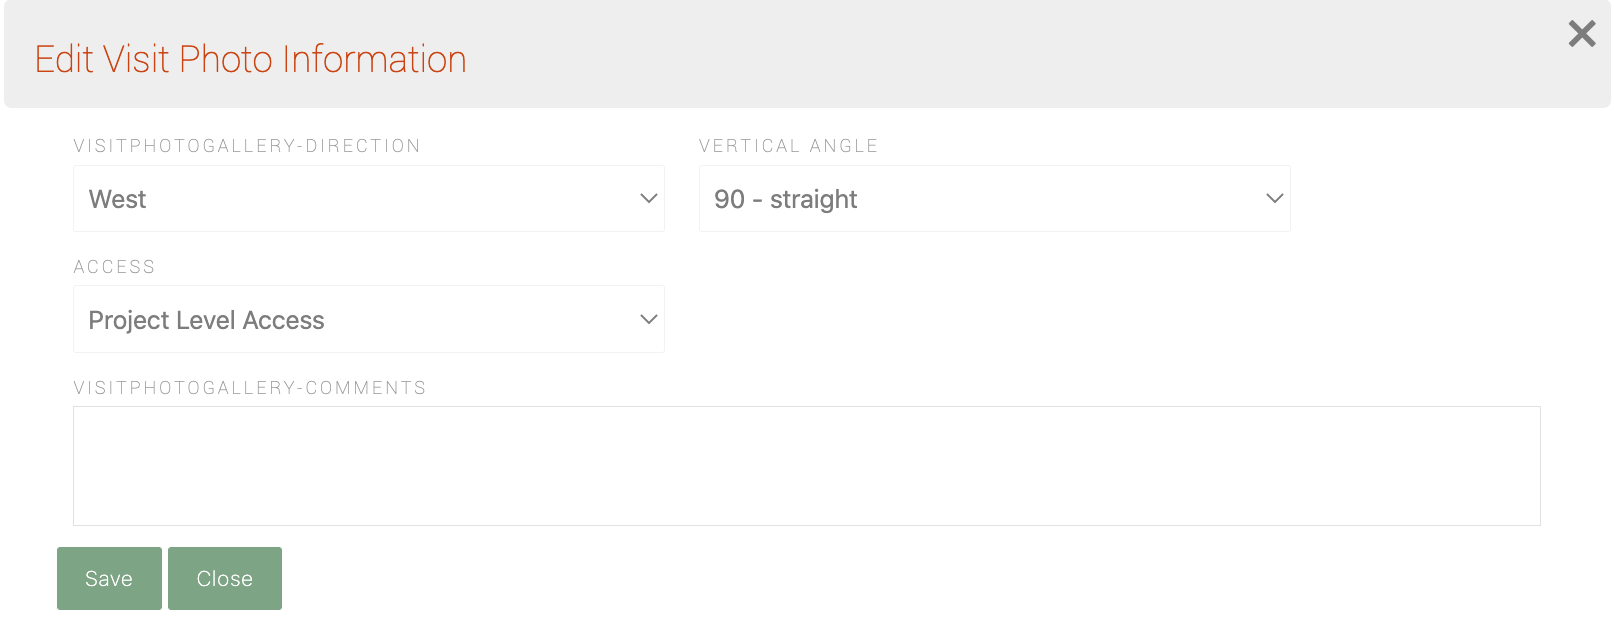
WildTrax also supports the following metadata for each visit image.- Direction: cardinal direction of the location broken down into sub-cardinal units
- Vertical Angle: angle at which the image was taken relative to cardinal north
- Access: the accessibility of the visit image; this is determined by organization administrators
- Comments: any useful information about the visit image
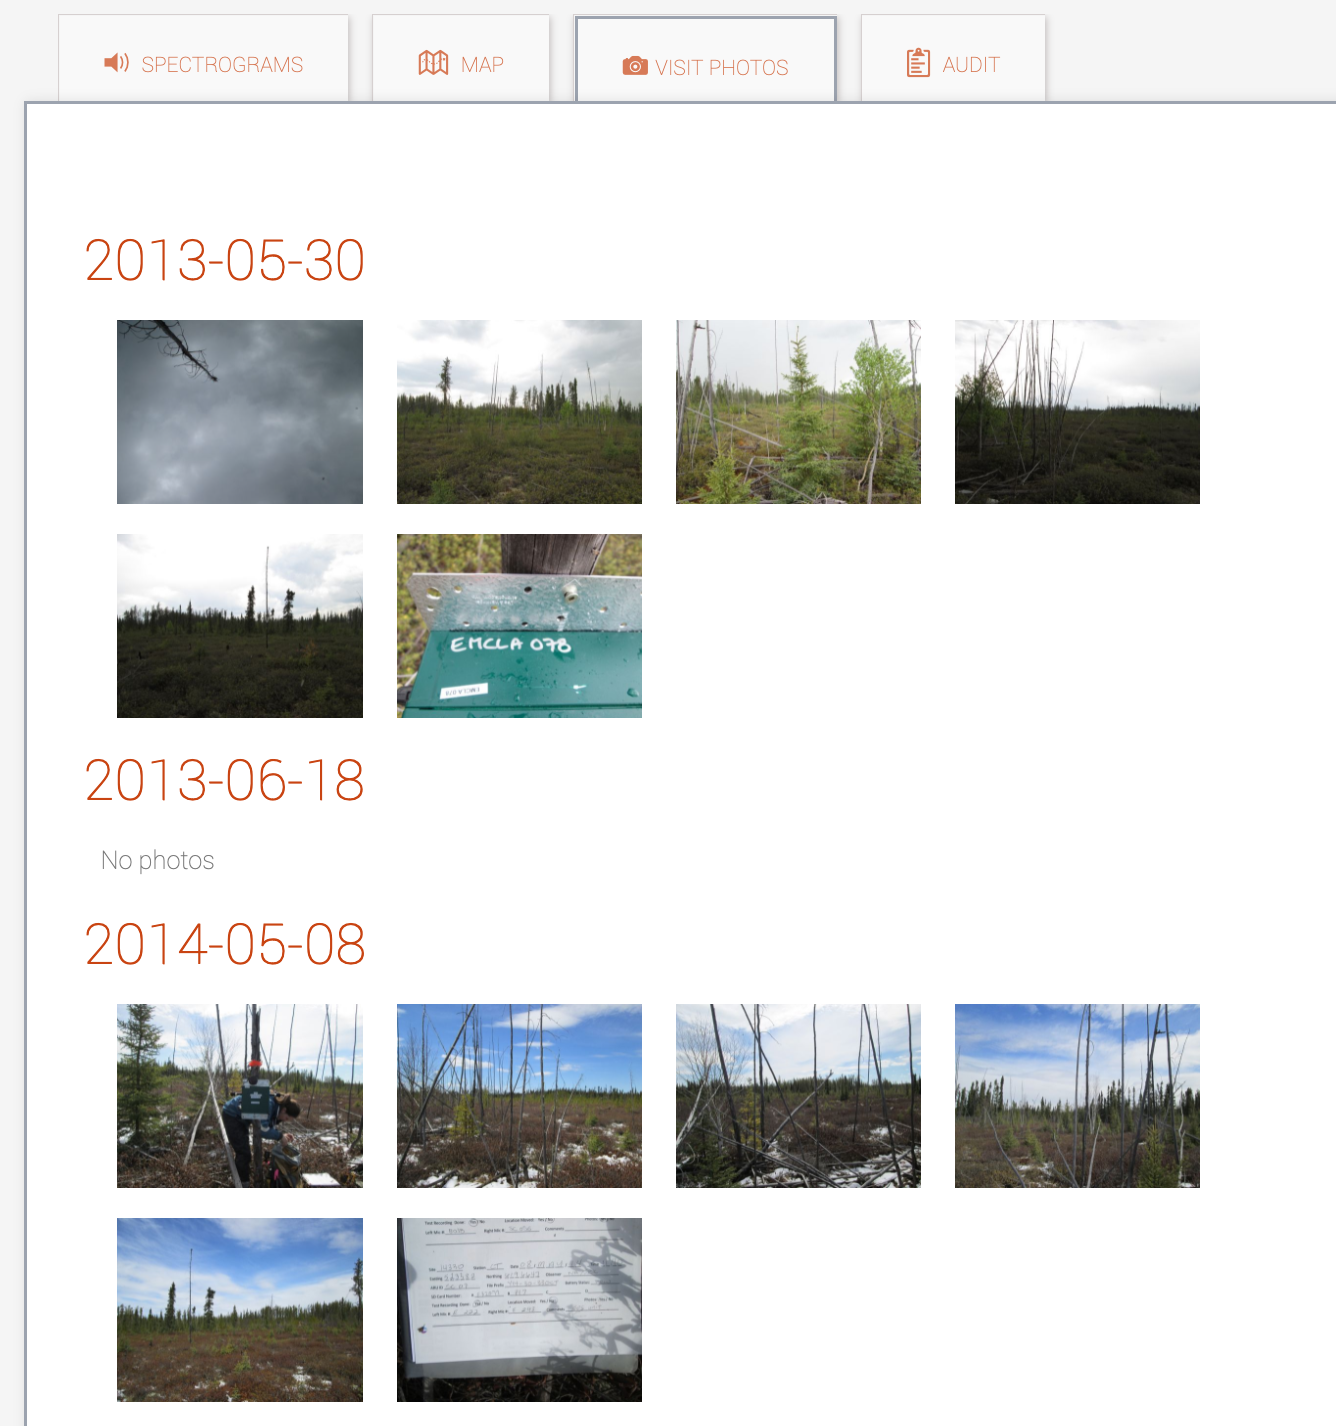
Once there are images associated with a visit, thereby a location, the photos will appear on the ARU and point count task page so that users can view the landscape where they are tagging or collected data.
- Select your images and click
-
Visit summary form
The visit summary form is accessible by clicking the
 icon beside any location in Visits. This presents a summary of all visits, sensors and equipment that have been used at the specified location. This section of the visit form is handy when you are servicing sensors over multiple months or years, or you need to know detailed historic information about the visits that took place for data quality control.
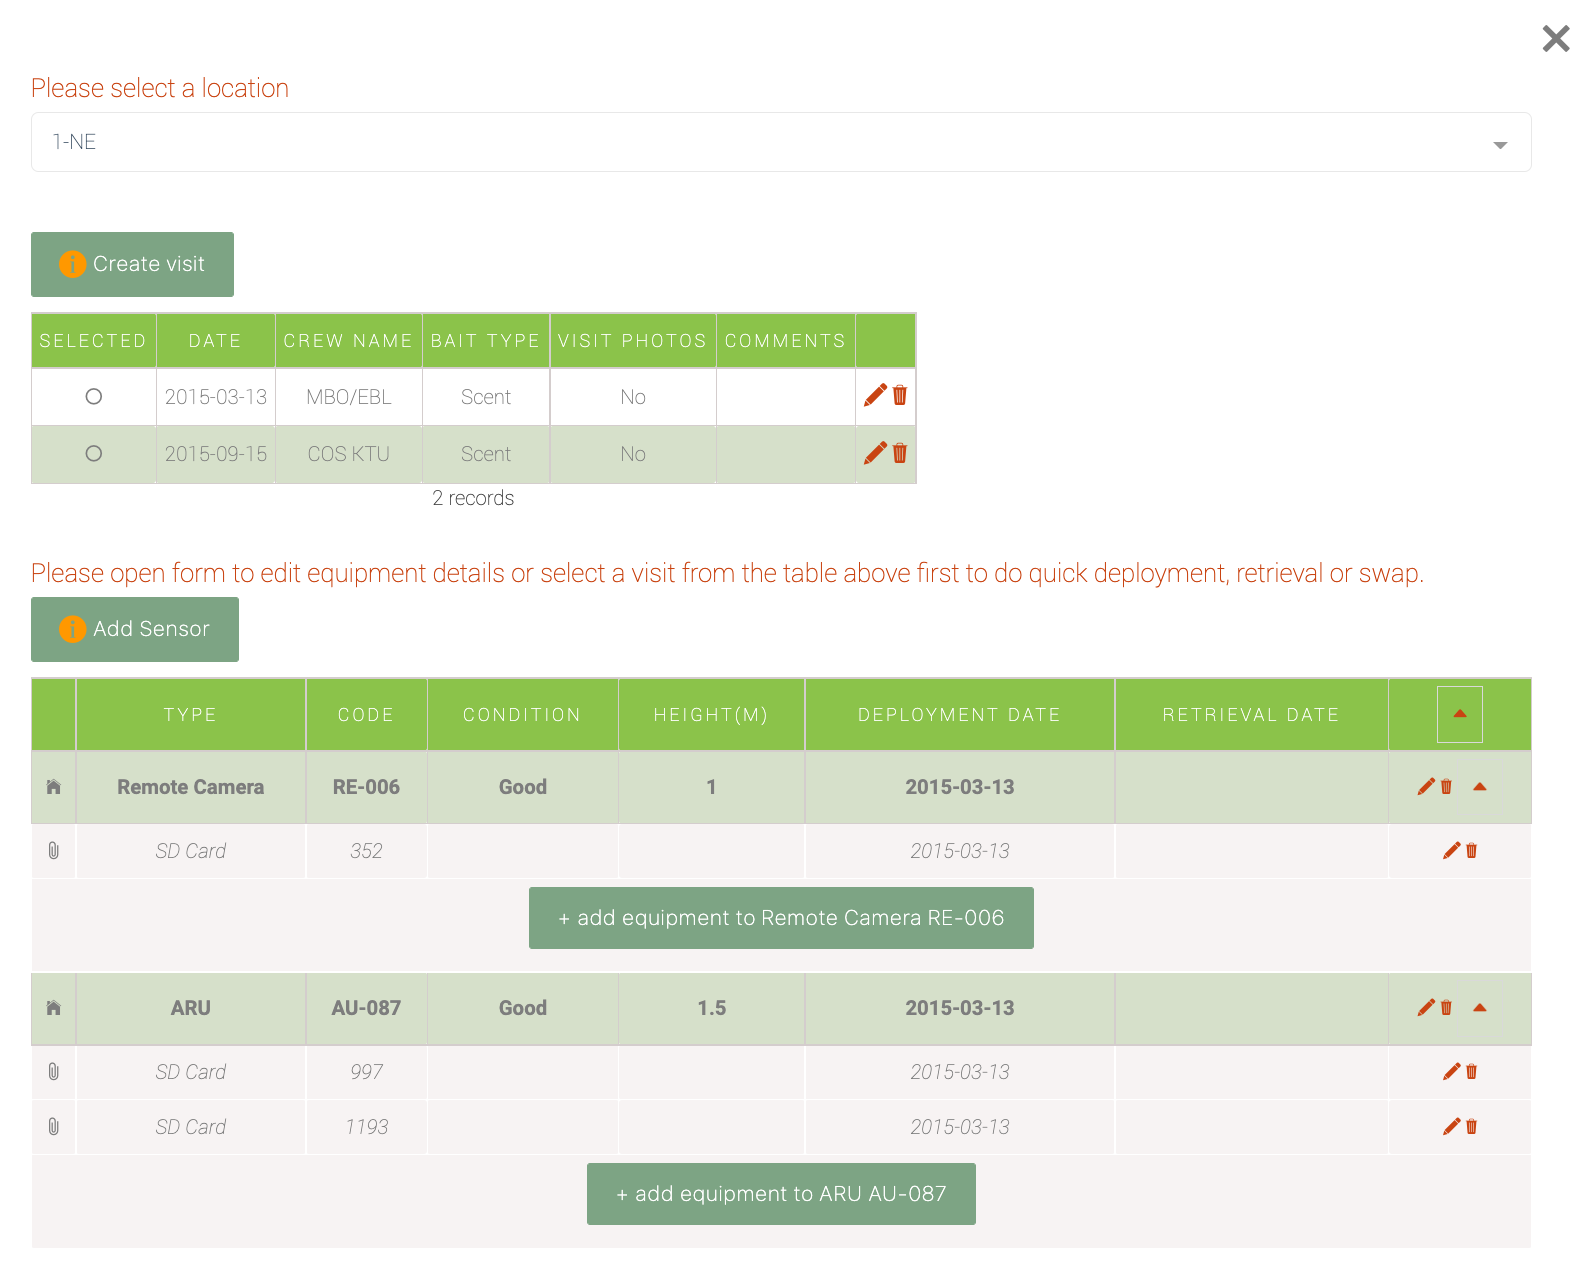
Advanced visit functionalities
When equipment is placed at a location during a visit, WildTrax calls this a deployment. Conversely, if you’re visiting a location and picking up an environmental sensor, this is its retrieval. At each of these times, you can add sensor (i.e. equipment) metadata to support the visit.
Conversely, when media are uploaded into WildTrax, there is the capacity to generate the visit automatically. Here are even more ways you manage your visits:
-
Adding equipment to visits
If you’re using an ARU or a camera to survey the location, you can add the sensor information either through the visit summary form (by first selecting a visit in the top part of the panel) or in an individual visit by clicking on the
icon. Click on to open the sensor form.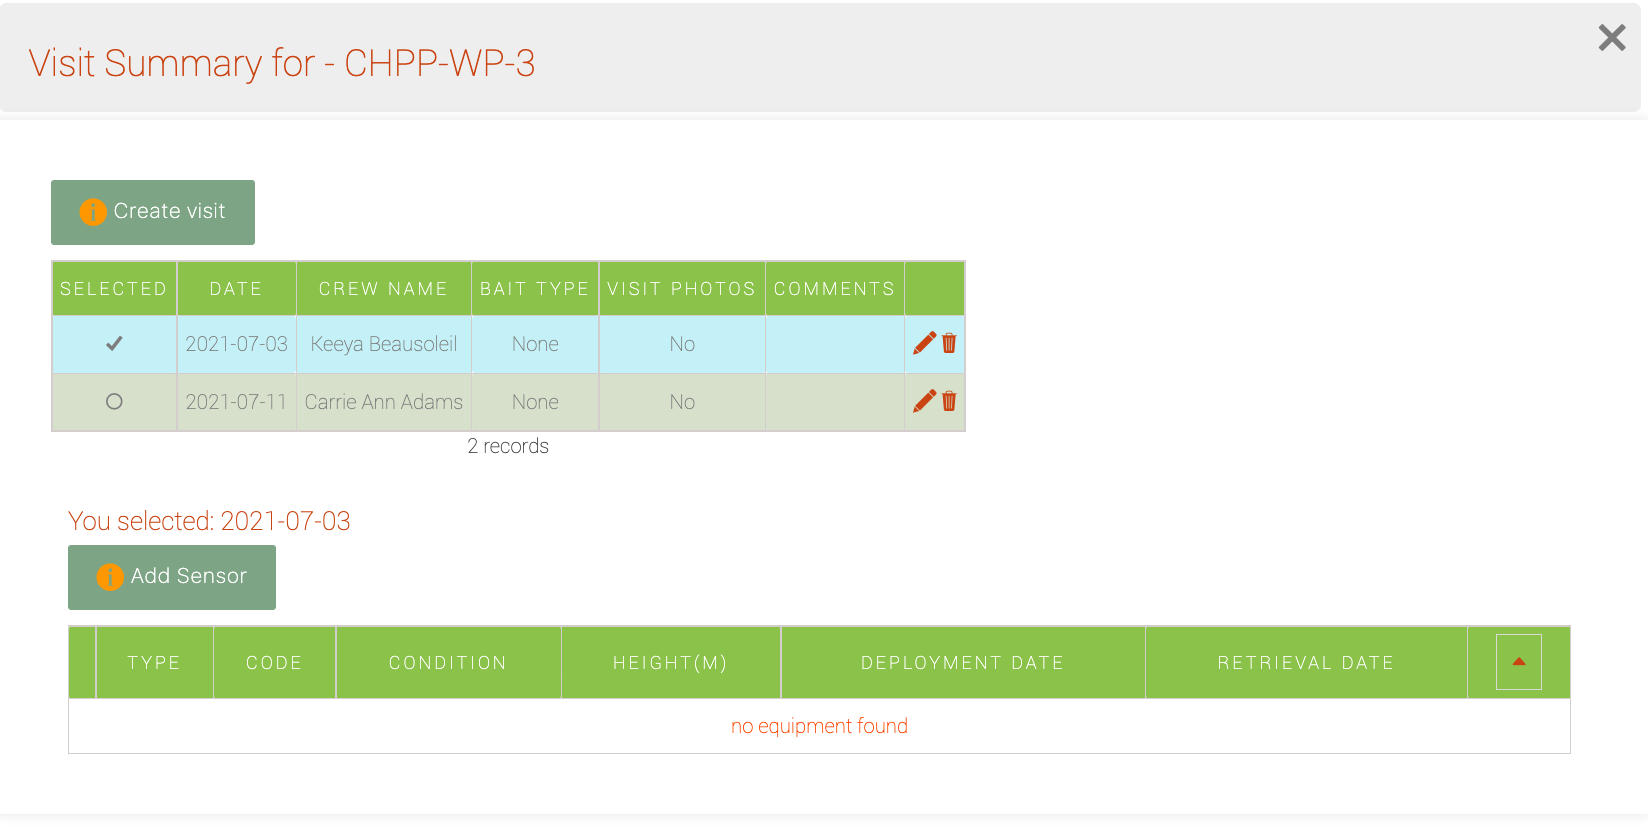
Within these forms you can select the sensor type (ARU or camera) and the visit during which the equipment was deployed or retrieved. You can do the same thing by clicking on the visit you’d like to add equipment to while you’re creating the visit.
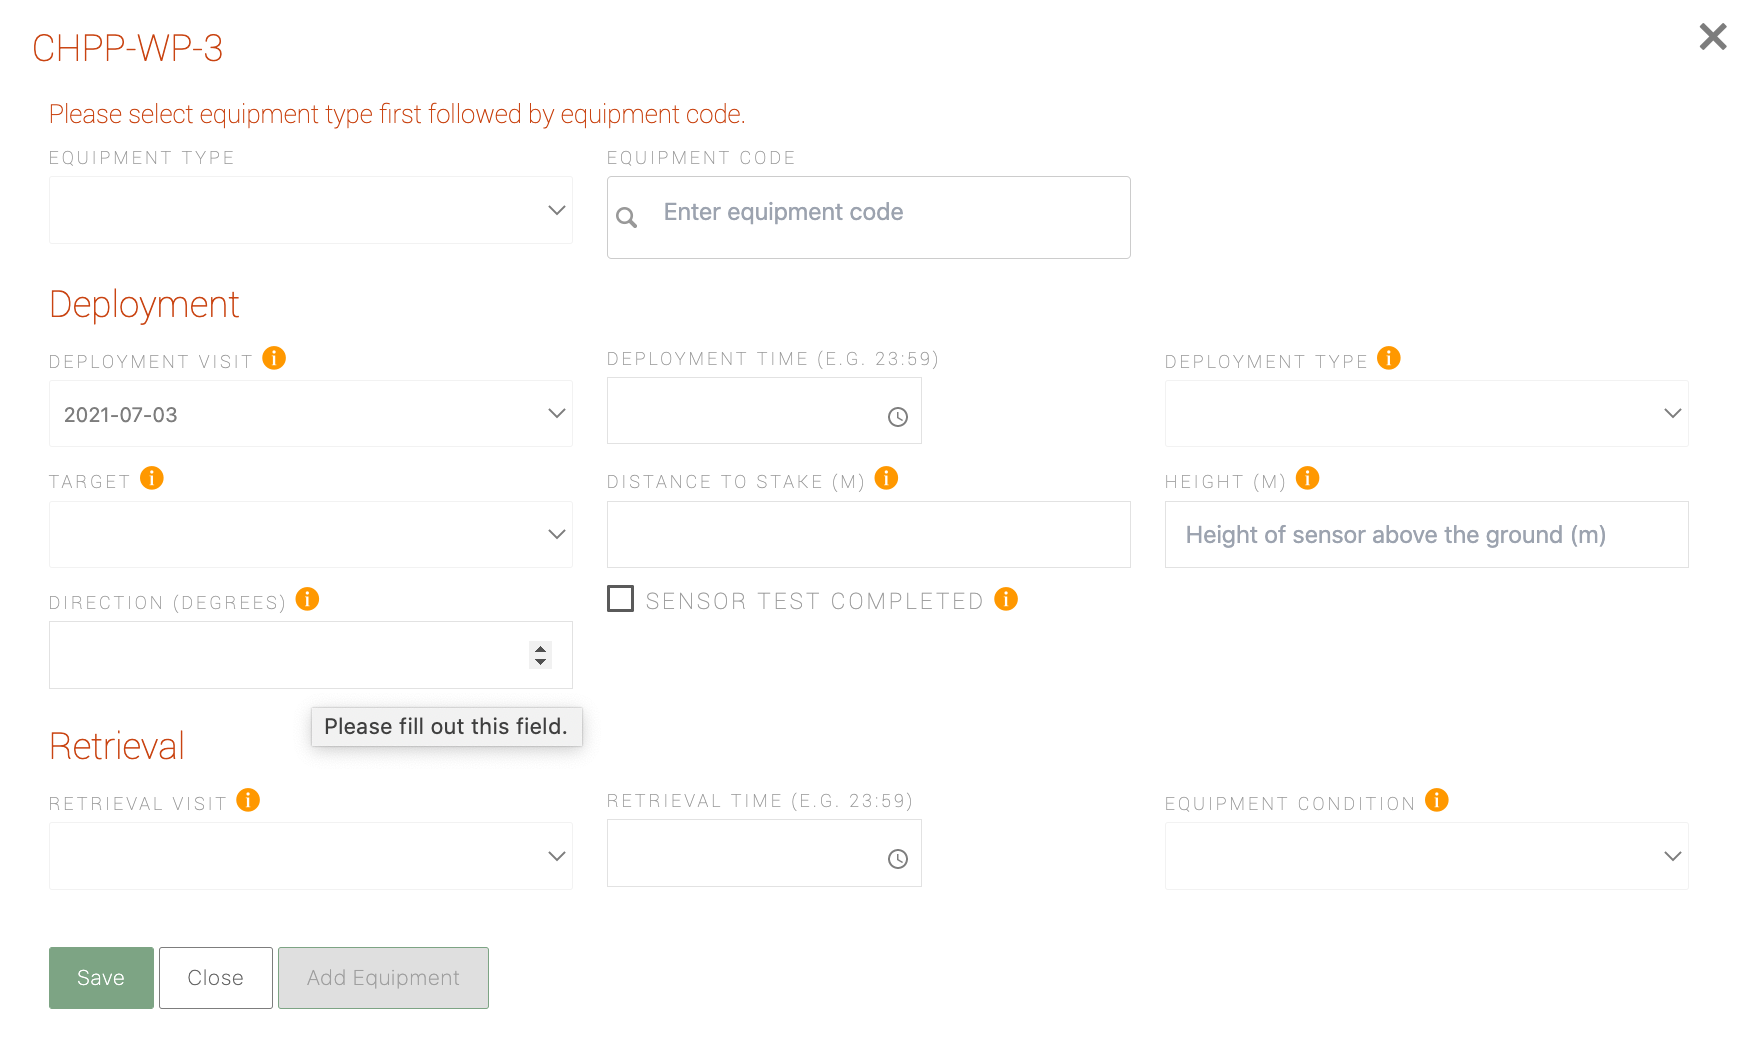
You can also quickly register new equipment by clicking the
 button when you select the sensor or equipment type in the form.
You won't be able to add sensor and equipment information until the visit has been created or selected. In other words you need to have visited the location first in order to deploy or retrieve equipment.
-
Syncing visits
Just like with locations, you can batch upload and download visits and visit metadata by clicking the
 button.
 - Click the
 in order to get the current list of all visits and metadata in your organization. If you don't have any metadata yet, the csv will provide the column headers.
 - Conduct the edits or changes to your csv
- Click on

- This will take you to the Upload CSV form; choose your local CSV file and click
 —this will allow you to preview the changes you’ll be making to your location data. If there are no differences, a prompt indicating
  will appear
 - To accept the modifications, scroll down and click

You only need to enter a date in order to create a visit; the rest of the values are optional.
Here's a list of the fields required and their description for the csv that you'll be uploading.
- Location: the location name
- Visit date: The day of the visit in the format YYYY-MM-DD
- Snow depth: snow depth in meters; e.g. 0.45
- Water depth: water depth in meters; e.g. 0.03
- Crew: the crew who visited the location
- Bait: whether the visit was baited
- Access method: the access method of the visit e.g. on foot, ATV, helicopter, etc.
- Land features: any significant landscape features around the location at the time of the visit; e.g. beaver dam, agricultural field, etc.
- Comments: a description of the visit
- Click the
-
Visit autogeneration
All media loaded into WildTrax contains spatial (locations) and temporal (date and time) metadata. You can take advantage of automatically generating visit metadata with the autogenerate visits function found in the
button. You can choose settings for the autogenerator prior to creating and quality controlling the visit metadata. The fields you can modify are as follows:
- Gap days: The threshold number of days between media (recordings or images) or point count surveys beyond which a new visit will be created.
- Check equipment: Compares the serial numbers associated with the equipment that collected the media against those entered in the visit metadata.
- Create new records: Suggests new visit records based on dates associated with the media
- Alter incorrect dates: Compares dates associated with the media to those entered in the visit metadata. The date of the first image or recording is considered the first visit (e.g. a sensor deployment) and the date of the final image or recording is considered the next visit (e.g. a sensor retrieval)
A few things to note before getting started:
- The visit autogenerator won’t give accurate visit metadata for ARU data because only a subset of recordings is typically uploaded to WildTrax for processing and these recordings are not usually the first collected by the sensor (e.g. the voice note or a test recording). The advantage of using the autogenerator is when a large amount of media has been uploaded to WildTrax but no visit metadata has been created yet. This sets the stage for an organization administrator to manage the visit metadata, append visit photos, etc.
- Image sets and surveys, on the other hand, work great!
- When image sets are uploaded into the system, all images, including those triggered at the start and end of the set (such as a human setting up or taking down the camera), will be used to autogenerate the visit.
- Surveys are simple as there is only one occurrence at a given time and location, so the visit history is unique.
To use the autogenerator:
- Click in the Visits tab of the organization
- Click Autogenerate Visits
- Choose the settings you’d like to use (see above)
- Click
 . Depending on how much media or visit metadata you are running the autogenerator on it may take a moment to process the results.
 - The corresponding table will show the location, a comparison of the media and visit metadata dates. The Action field summarizes the information that the autogenerator creates
- Select any of the locations to accept the results
- Scroll to the bottom of the table to create visits or override individual selections by creating all visits. The results will then be populated in the visit metadata form.