Index
3.2 ARU projects

The goal of an ARU project is to upload media, process tasks, verify tags and publish the results. Projects belong to organizations and use organization media on order to generate and report on a certain set of results designed by the project administrators.
Clicking on the ARU sensor on the main project dashboard will show which projects you have access to. The list of projects you see is determined by your organization membership, project membership and status of the project. You can use the filter and sort some of the project attributes to find what you’re looking for:
- Organization
- Project name
- Project status
- Due date
- Total number of tasks
- Total number of completed tasks

Clicking on the  brings you to the Project Settings window. You can also click on the
 ![]() to find out more details about the project or to Request Access. The
to find out more details about the project or to Request Access. The  toggle filters the default view to only projects to which you are a member (either administrator or read-only).
Creating an ARU project
Click on  . This will open the Project Settings form allowing you to begin adding information to the project. The Create / Update ARU Project contains the following fields - those marked with a * are mandatory before being able to create the project.
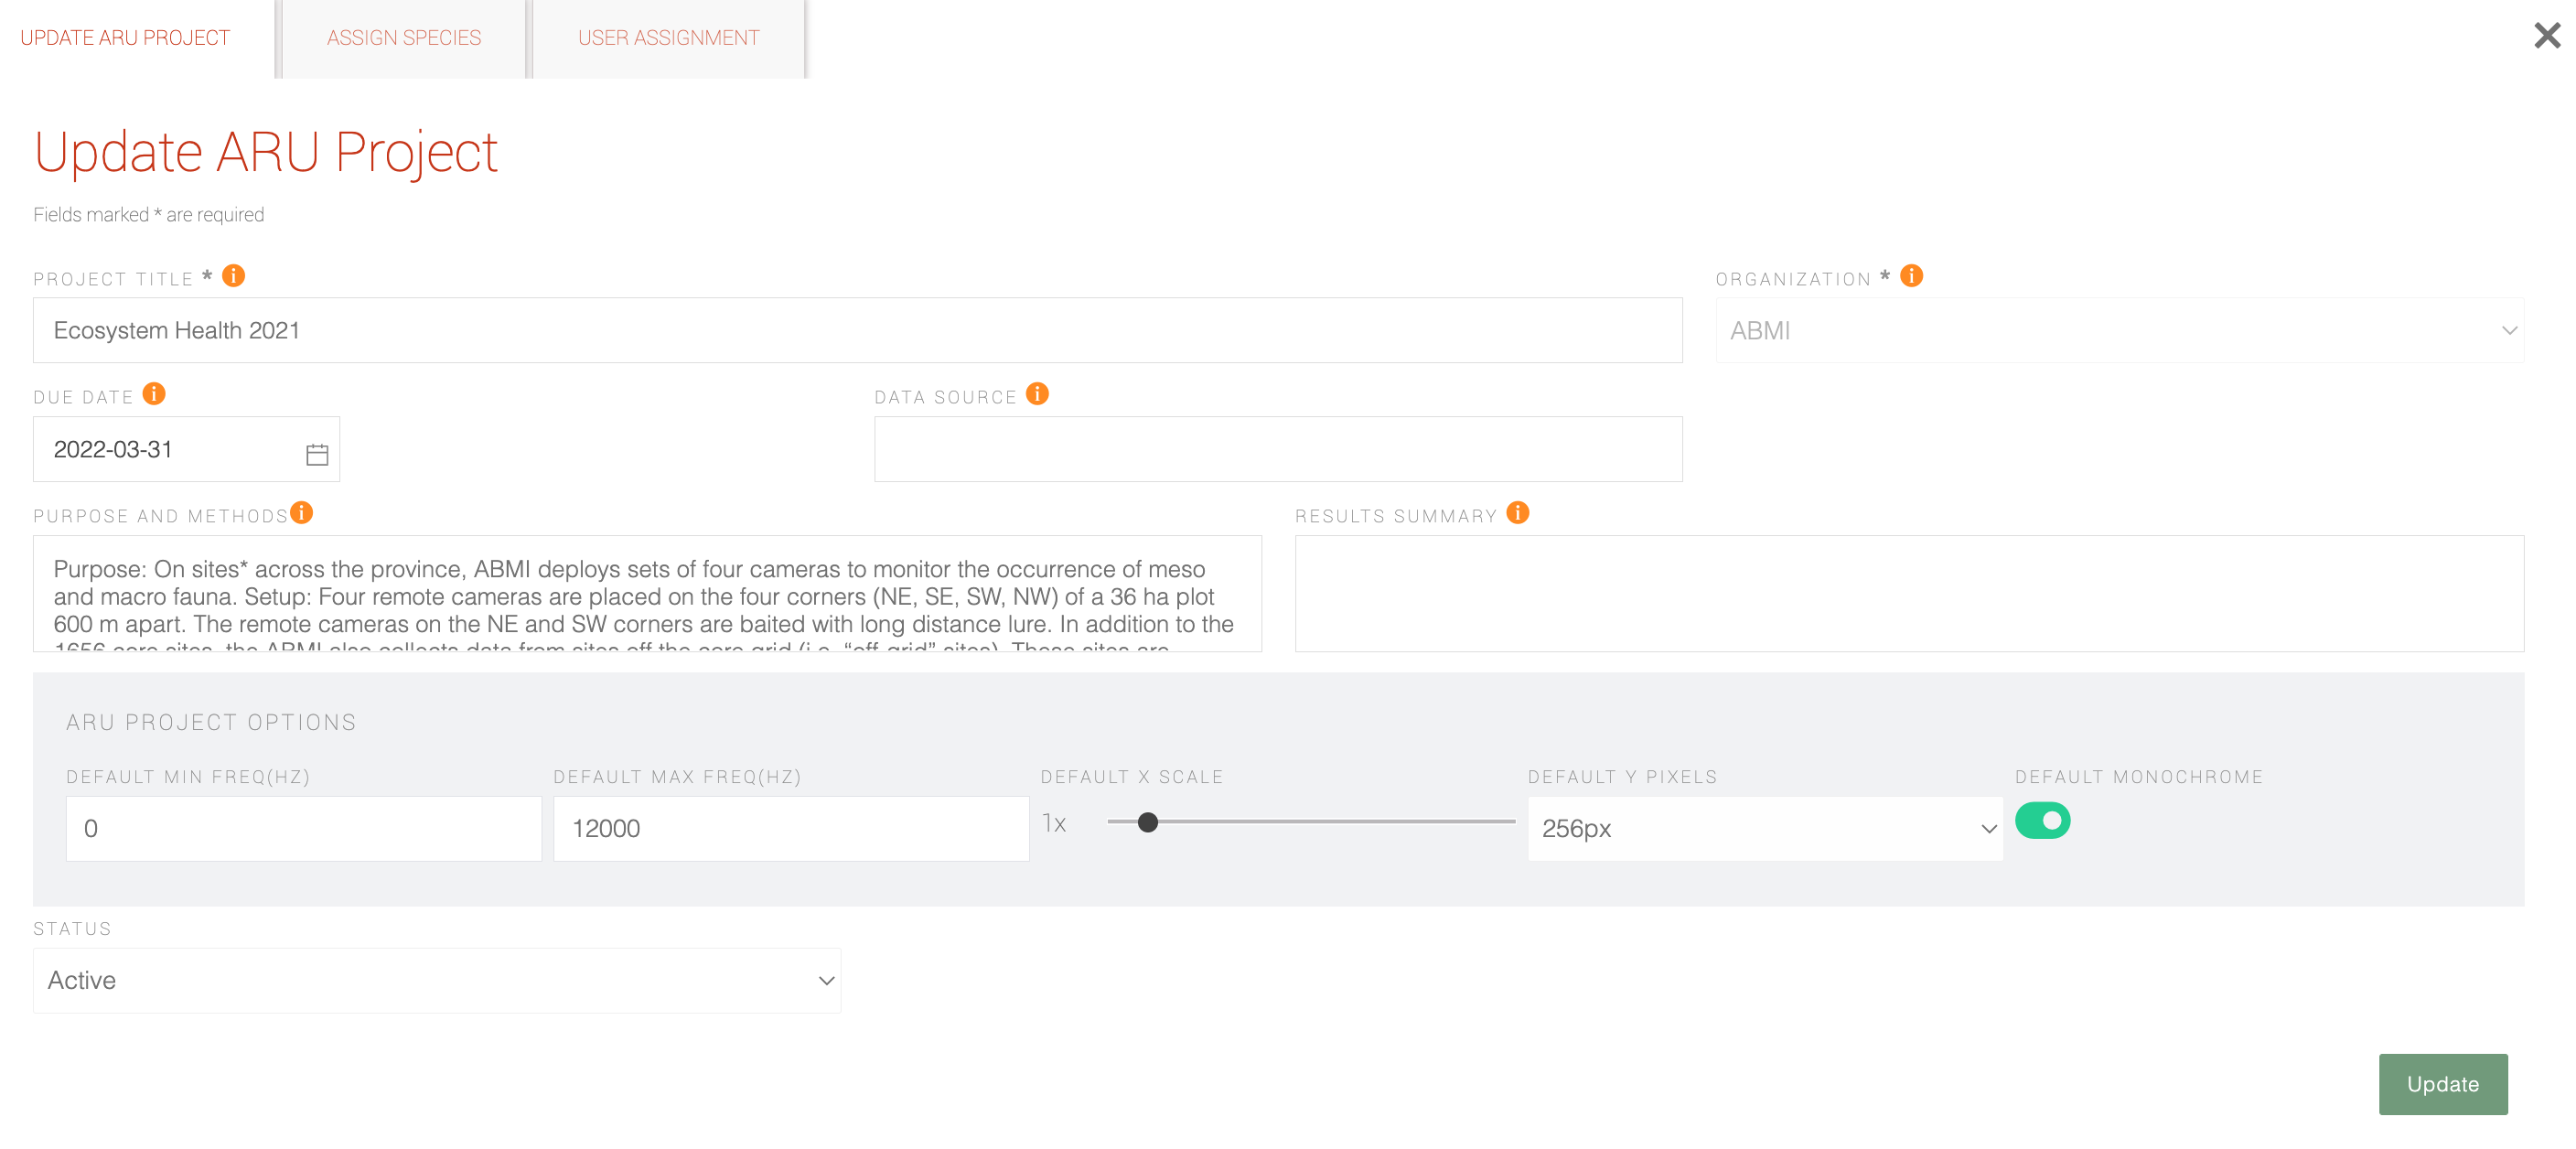
- Project Title*: A short name to identify the project
- Organization*: Drop-down list of all existing organizations of which you are an admin. This field allows you to group all of your projects together in the database. Once your project is saved you will be unable to change the organization to which it belongs.
- Year: The year the data was collected.
- Data Source: If you are importing data from an outside source (e.g. previously tagged data), please specify the original source of the data.
- Methods: A short description of the methods used to create this project and goals it hopes to achieve.
- Results Summary: A short description of the results your project found.
- ARU Project Options box:
- Minimum and maximum frequency of the spectrogram that will be displayed
- X Scale: Length displayed in seconds. Corresponds roughly to 0.25x (60 seconds) to 10x (2 seconds) in length displayed
- Y Scale: Height of the spectrogram in pixels
- Default to monochrome colour palette toggle: Alternative is colour
- Default to light mode toggle: Alternative is darkmode spectrograms

Once your project settings are completed, you can click Update and move onto the next two steps of the project creation process which include adding species and users.
-
Species assignment
The Assign Species tab contains a set of tools that allow you to limit or choose which species you want to tag in your project. You may want to do this in order to control the amount of tagging error (incorrect species identification) or to limit which species you want to tag.
To add species to your project, click on a species in the Not Included column (the row will turn blue once selected) and click the arrows to add it to the project's included list. You can also unselect and select all from either column. Once a species has been tagged in the project, the assign species tab will automatically lock the row preventing you from removing the species from the project if it has already been tagged.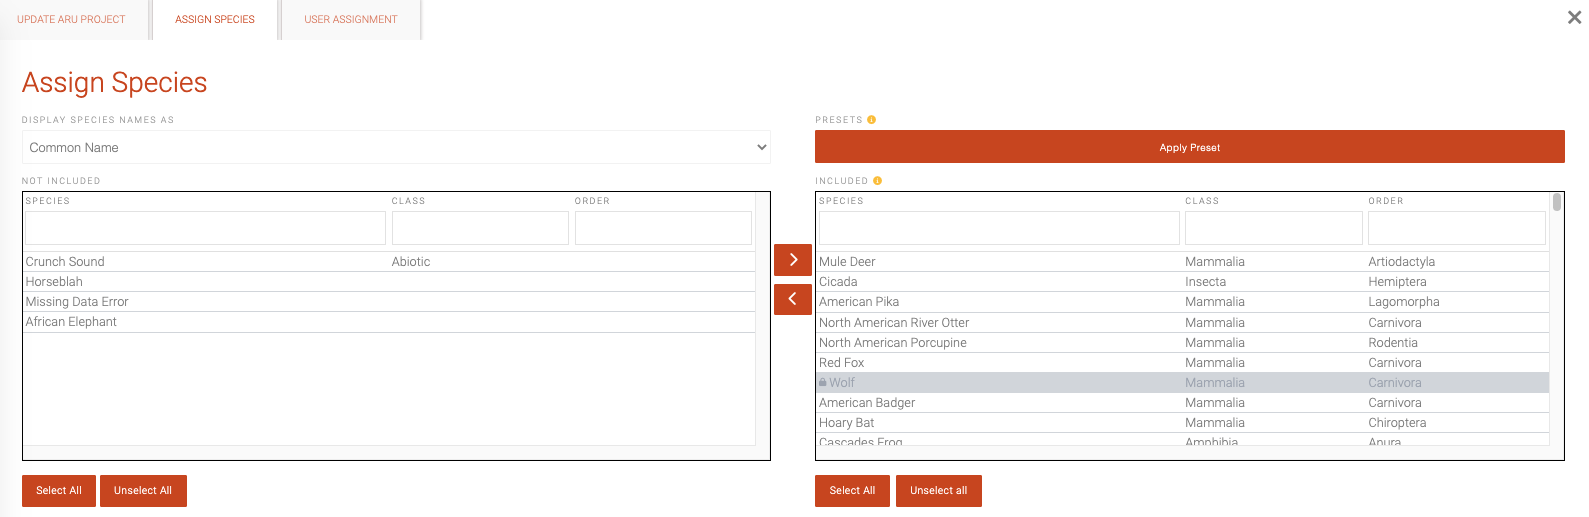
You can also add an entire group of species using the preset groups found in the Apply Preset button. Click Apply Preset and then search and select which groups of species you'd like to use. You can select one or many groups at a time. Once you're done with your selection, click Submit and the species will be added to the project.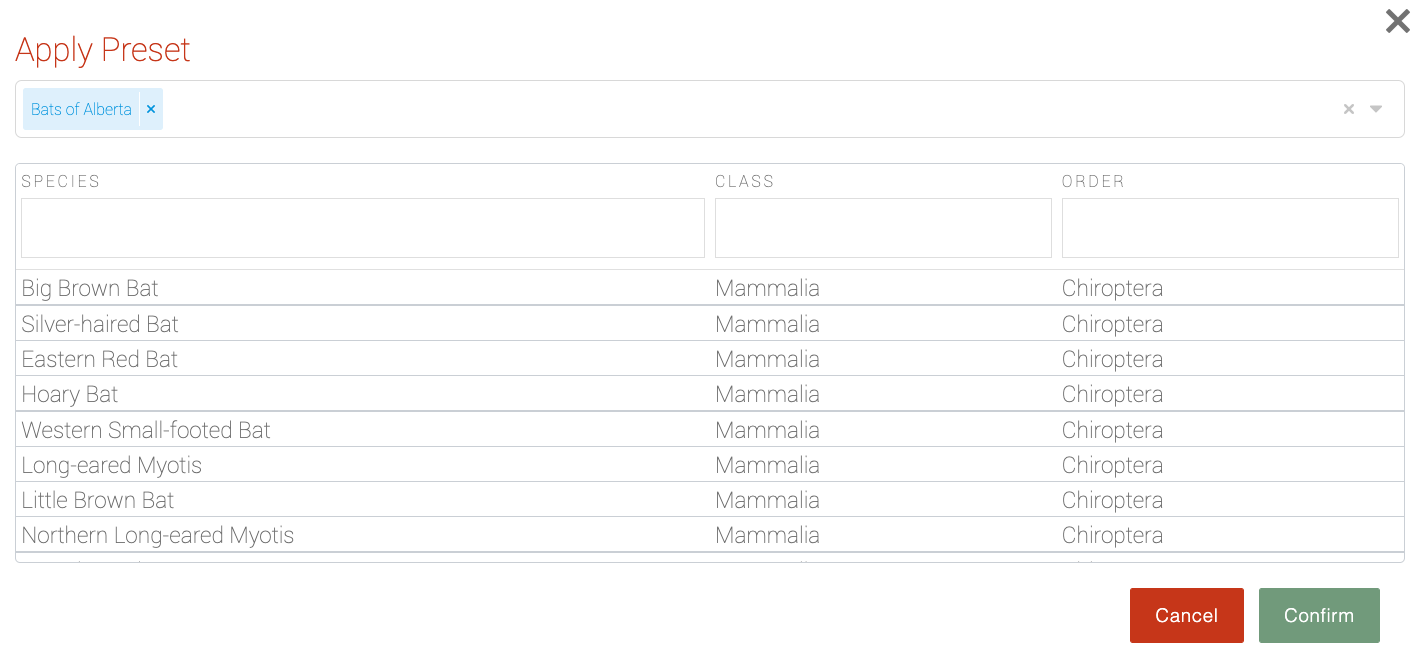
If you have a preset group or species you would like to be available, email info@wildtrax.ca with a request.
-
User assignment
Once you've created and saved your project details, you’ll be able to manage the users who are part of the project. Select the
 tab to add and view current administrator and read-only project members.
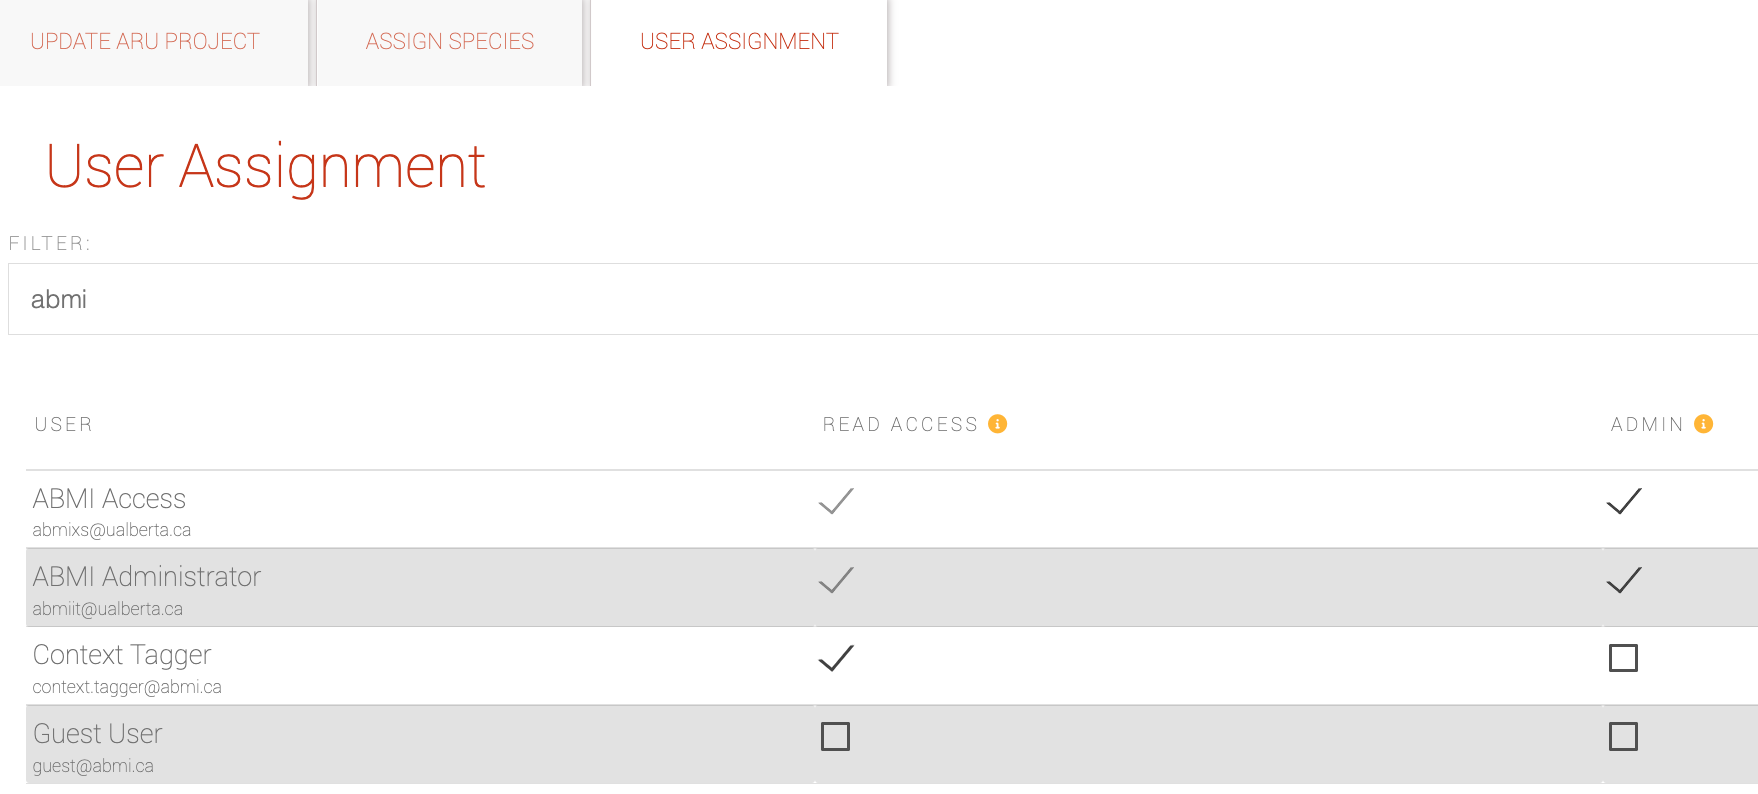
- Project administrators have both read and write access to the project details, settings. They can add users to the project and can assign taggers to tasks.
- Project read access members can view project details, and settings, and all tasks within the project. However, they can only edit tasks assigned to them.
Once you have created your project and close the window, the new project will be visible in the ARU project list. Click on the project title to enter the project page or click
 to edit project details, settings or users.
Users are granted their respective membership levels to an organization's projects. You don't need to add an organization member to a project unless you need to grant them administrator privileges and they only have organization read-only.
-
Recording management
A recording is the raw media or audio file that is uploaded to an ARU project in WildTrax.
WildTrax supports four audio file types: wac, wav, flac, mp3
- wac are proprietary, lossless compressed file formats developed by Wildlife Acoustics
- wav is the standard, ubiquitous uncompressed audio file format
- mp3 a lossy compressed audio file format; works by reducing the accuracy of certain sound components, and eliminating others
- flac is a lossless compressed audio file format
A recording uploaded to WildTrax must also contain two important pieces of information, a location prefix and a timestamp. This allows WildTrax to generate or append the media to the locations stored in the organization as well as tell you when the recording took place.
When data are uploaded, WildTrax converts and stores the audio as flac and the spectrograms are generated using the raw audio file format.
-
Uploading recordings and creating tasks
Once you have the recordings selected that you wish to upload for processing, go to the desired project and click
 and then
  . The recording upload window will open providing you settings before you upload your files.
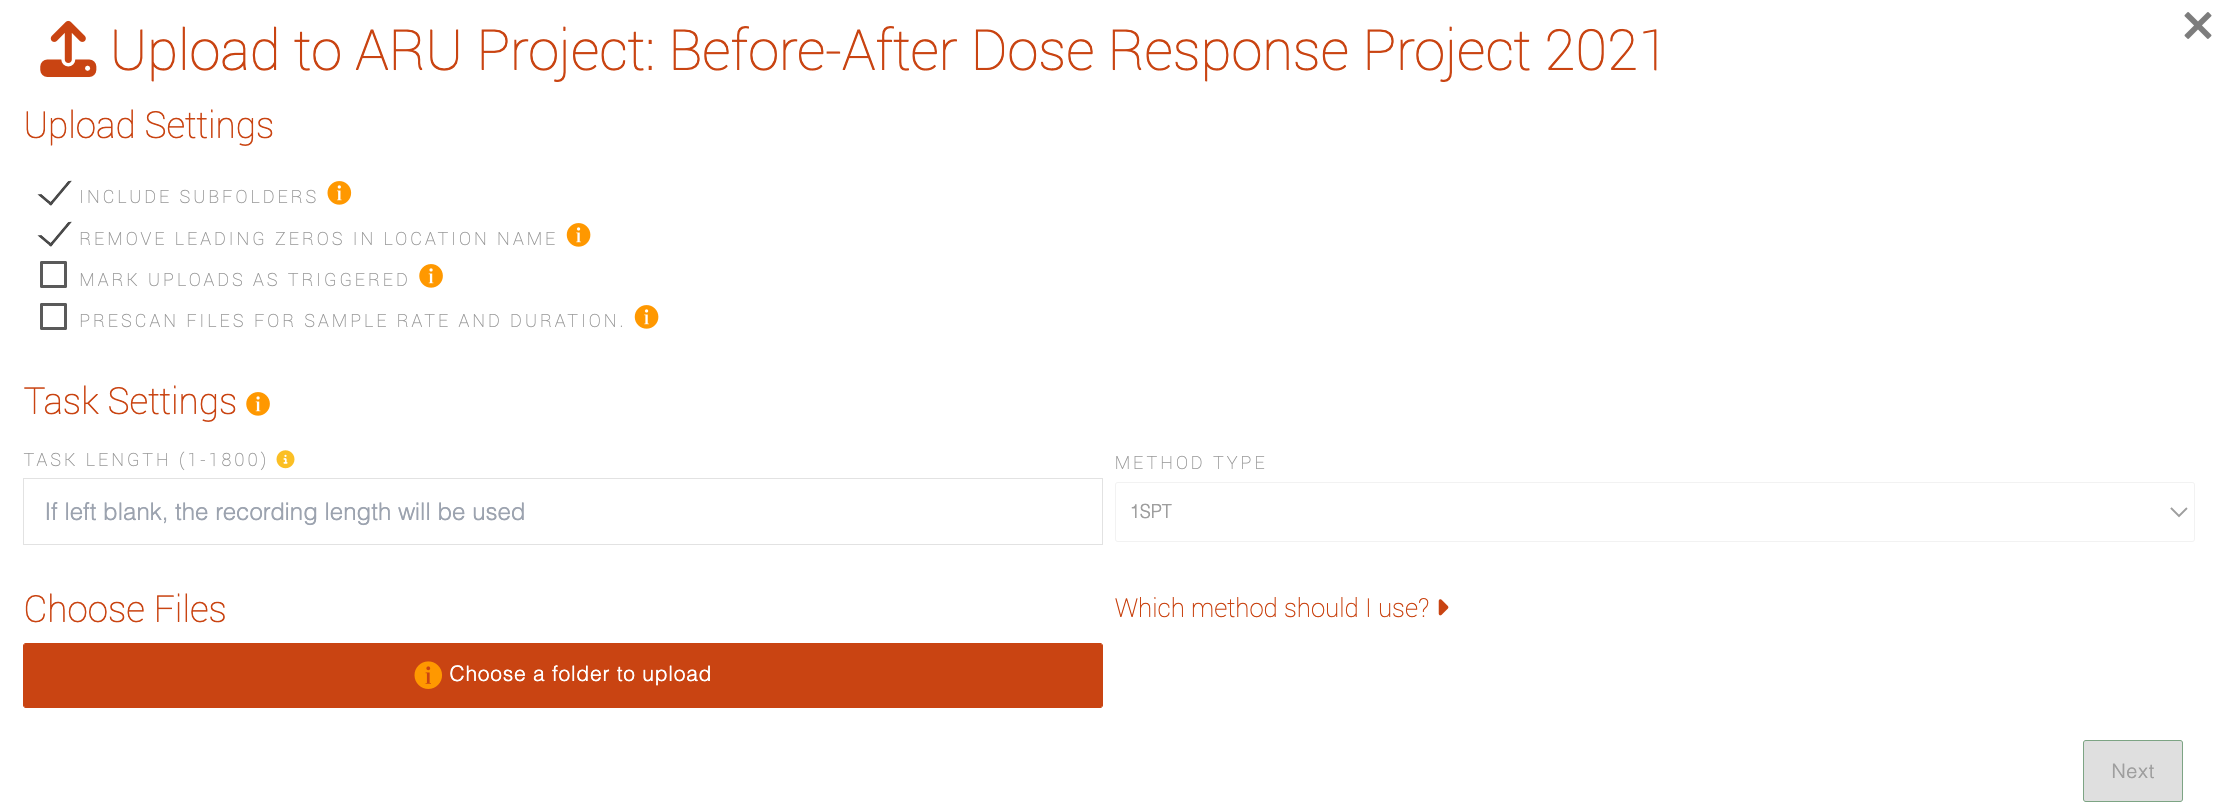
- Including subdirectories to scan if your media is layered in a hierarchical structure
- Removing leading zeros after delimiters helps to clean up the location naming to a generic WildTrax standard. It is not obligatory to use this function but is recommended
- Recordings uploaded to WildTrax through a project automatically have a task generated for them. This allows a spectrogram to be generated and the task added to the project dashboard. You can upload recordings to the organization if you don't want to generate tasks yet - see media management for more information.
- The default length and method type will be applied to all the recordings you’re uploading - you can select a different method or length later on if needed
- Marking recordings as triggered to differentiate them from schedule-based recordings
- Optionally pre-scanning recordings to show sample rate and length during the upload process
Click
 and select the directory that contains your recordings. WildTrax will identify how many files it has scanned which will then allow you to go to the next step.
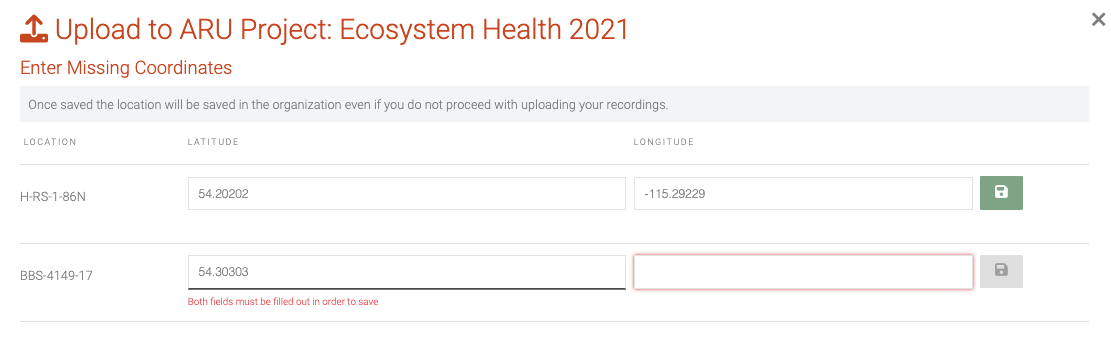
The next part of the process is entering spatial coordinates to new locations or enter coordinates if locations are missing them. This step in the upload process is optional and you can enter this information later using the Upload and Download Location tool. Note that:
- If the location doesn’t exist yet in the organization, WildTrax will create it
- If the recording is shorter than the method you indicated by more than 3 seconds (e.g. 56 seconds for a 60 second length), you’ll be prompted with an error that a recording shorter in length than the desired method should not be uploaded to WildTrax
When you’ve completed reviewing the form, click on
 to initiate the upload. It is strongly recommended to connect via ethernet if you want to stabilize and ensure internet connectivity while you upload media.
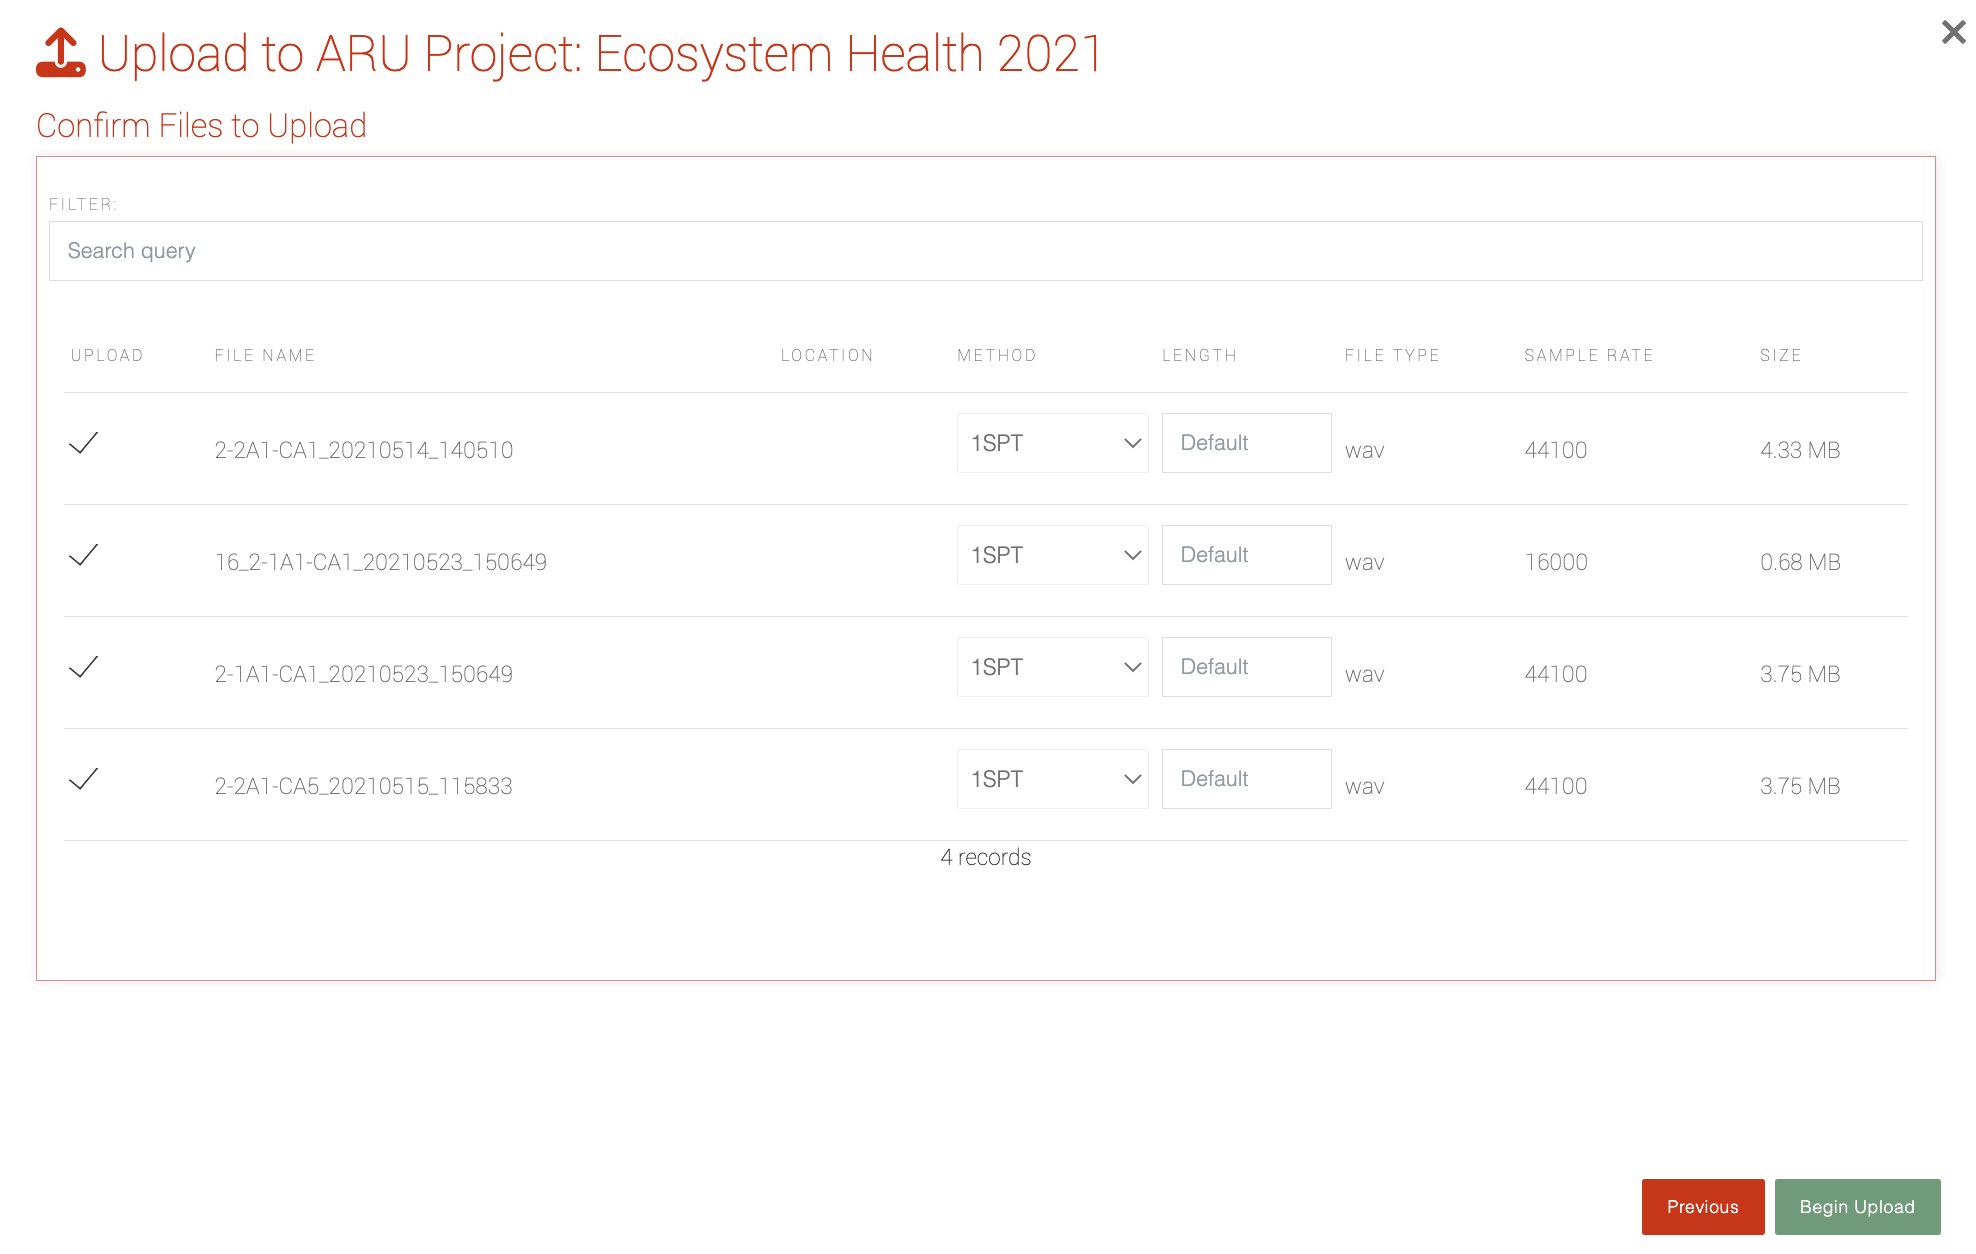
Managing an ARU project
-
Location management
Administrators can benefit from managing only the locations from the media in the project, This differs from location management at the organization level, where locations from all projects can be managed.
- Click the
 and go to
  to obtain the current list of locations in the project. If you don't have any locations yet, a template will be provided.
 - Make the changes or additions you'd like in the csv and re-upload the csv with the modifications using

- Click the
-
Task management
When recordings are uploaded to a project, new tasks are generated from the media and are added to the project dashboard under
 .
.A task is a unique combination of a user, a processing method and a recording. This flexibility allows you to generate tasks using the same recording but allow for multiple users or processing methods.
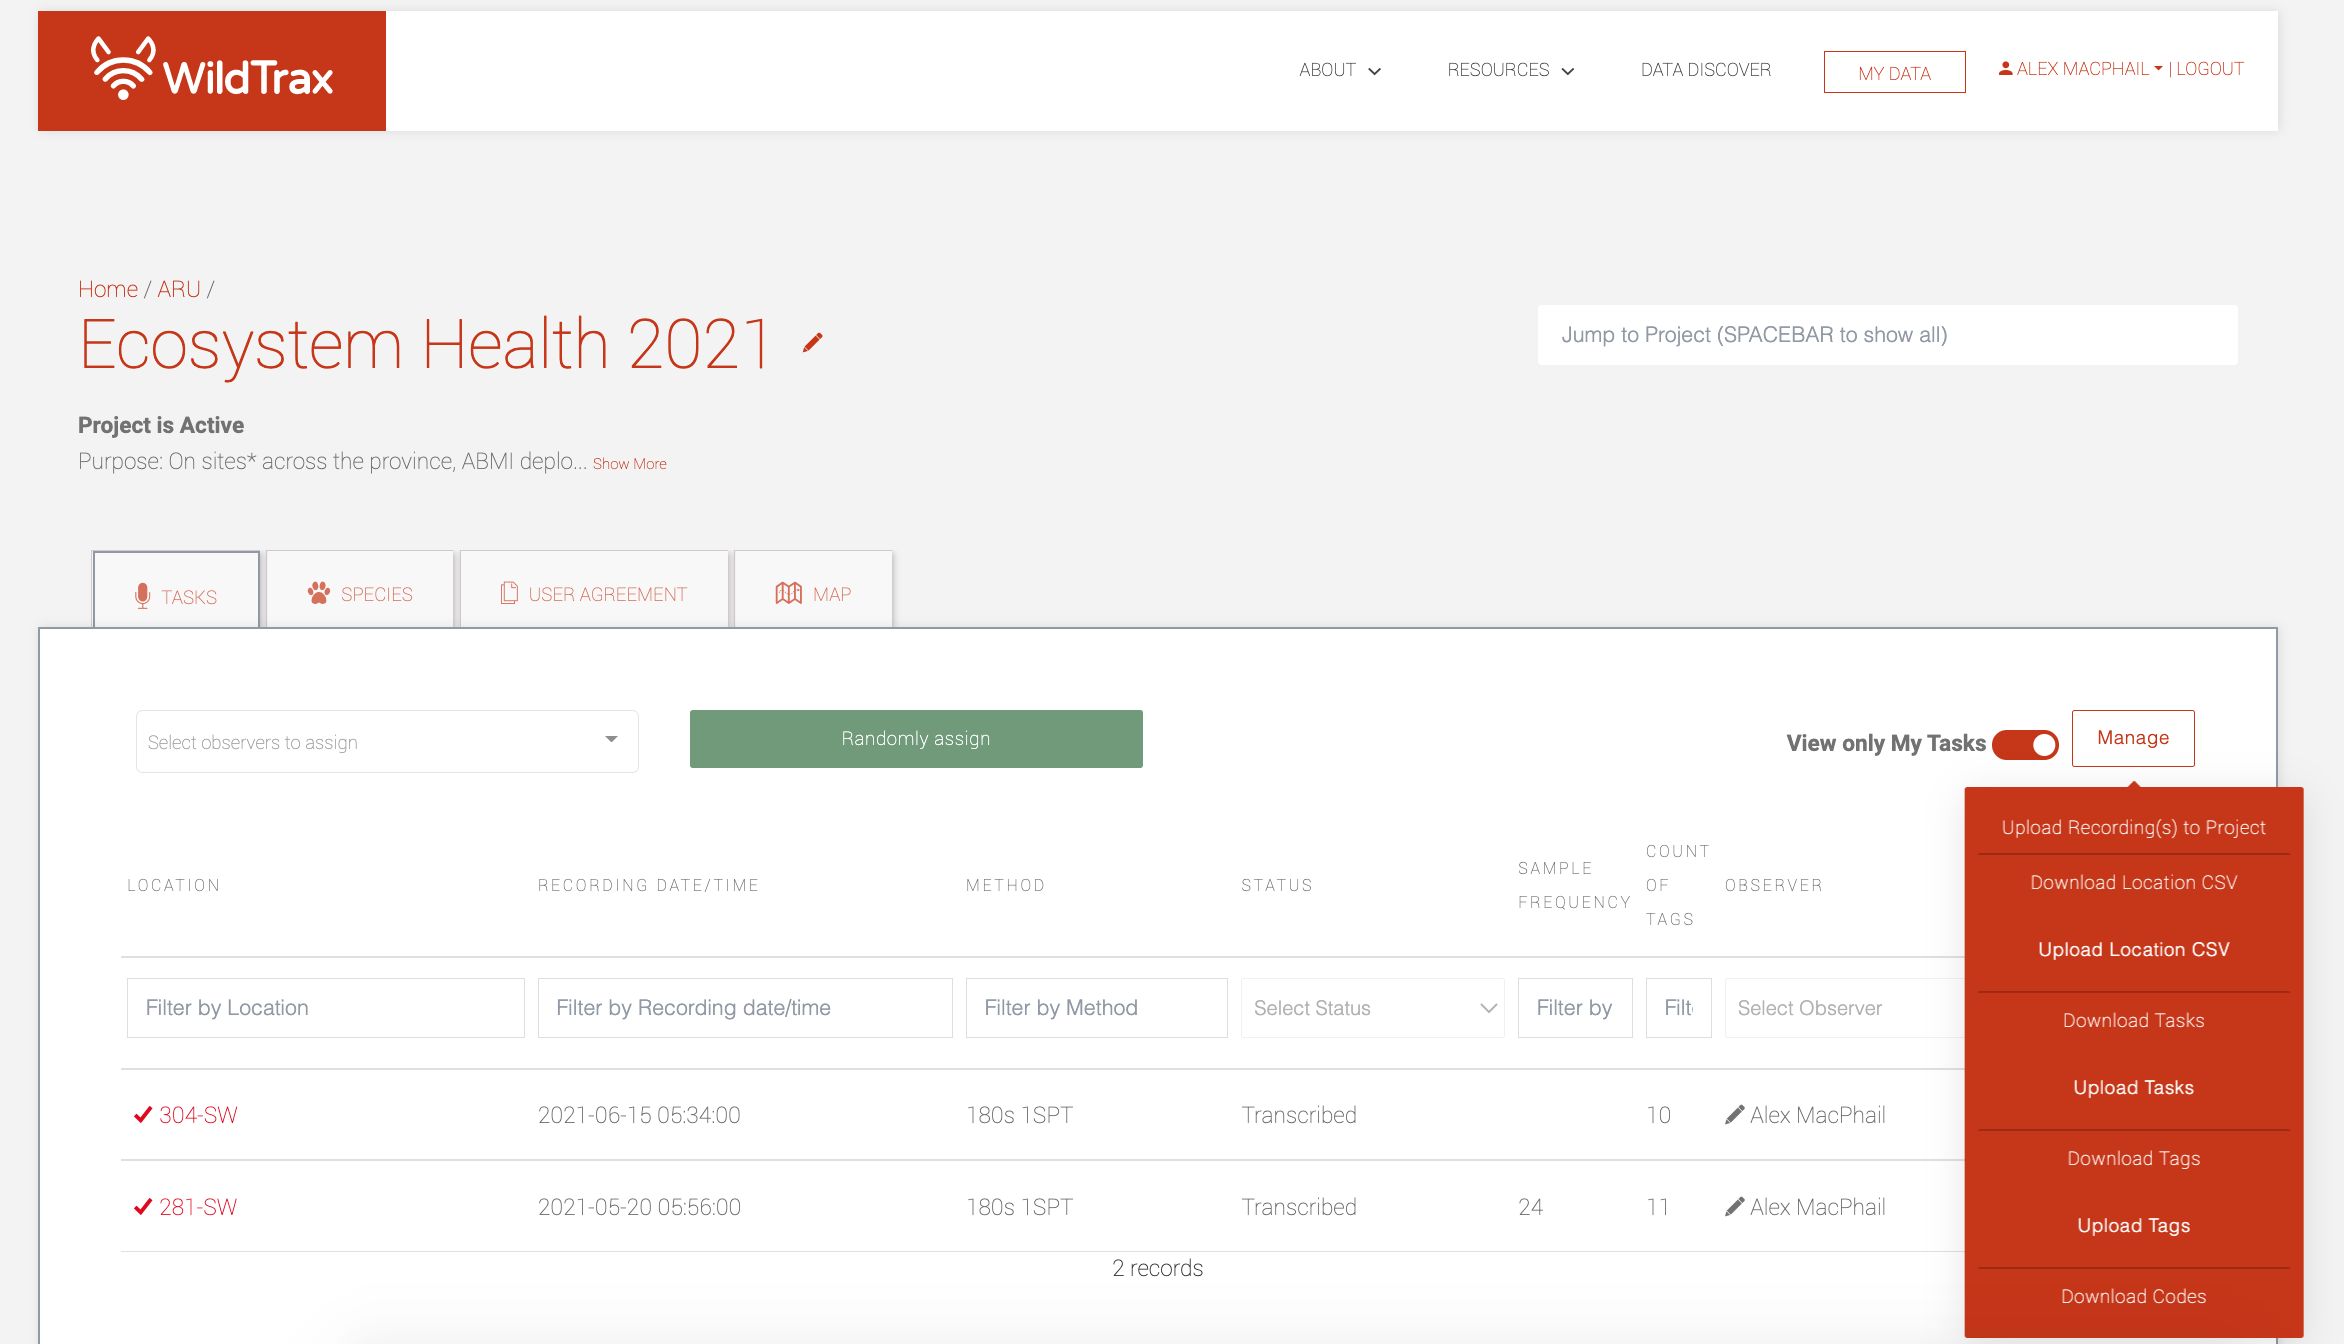
Go to the project dashboard and click
. The form will display the list of tasks currently in view depending on the  toggle - switching the toggle to red allows you to filter the list to only your assigned tasks. The metadata for each one includes the location name, the date and time of the recording, the method it was assigned, the status of the task and the assigned user.
 If you didn't generate tasks when you uploaded recordings to the project, or, if you're using an organization's recordings to create tasks, you can also use the
 tool under the button to automatically generate the tasks you need. Use the Download Tasks or Download csv template button and fill in the following fields:
- Location*: Name of the location
- Recording Date and Time*: The date and time the recording took place (YYYY-MM-DD)
- Method*: The method of the task
- Length*: The length (in seconds) of the task
- Transcriber: The user who processed / will be processing the task - this can be left blank and will automatically default to Not Assigned
- Status: Task status - this can be left blank and will automatically default to New.
- Rain: The average rain on the task
- Wind: The average wind on the task
- Industry noise: The average chronic industrial noise on the task
- Other noise: Other noise averages on the task
- Audio quality: The audio quality of the task
If you have hundreds or thousands of tasks without an assigned user, you can use the
 button and select users from the dropdown list on the left to assign tasks to. It will randomly, and equally, assign unassigned tasks to the selected user(s).
If you're a project administrator, you can also delete tasks from the project dashboard by clicking the
 beside the desired task and clicking
  . Follow the prompts and warnings accordingly as task deletion is permanent and irreversible.
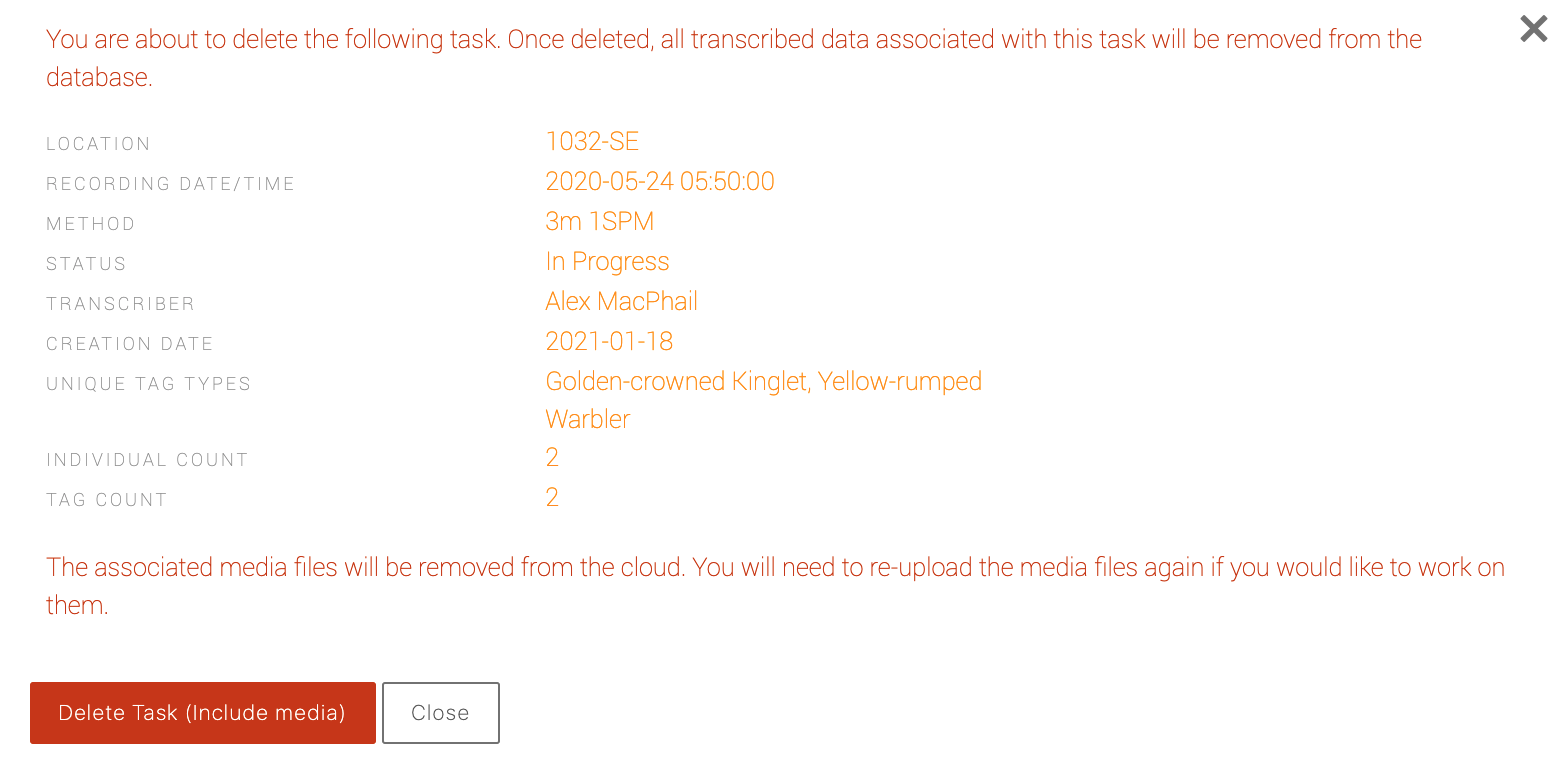
-
Tag management
The
button also contains functions that allow you to upload and download tags to and from a project. This is useful if you've ever tagged acoustic data in another database and wish to sync it to WildTrax standard or you're looking for downloadable record of the tags and their metadata. Here are the csv fields required in order to upload - if you're project doesn't contain any tags, you'll be able to download a template first by clicking .Before you can upload tags into the system, you'll need to first upload the recordings and create tasks in order to have the proper metadata needed to populate the tag csvs. You cannot generate tags for tasks or recordings that don't exist.
- Location: Name of the location
- Recording Date and Time: The date and time the recording took place (YYYY-MM-DD HH:MM:SS)
- Method: The method of the task
- Transcriber: The user who processed / will be processing the task
- Species: The species of the tag - if you don't know the species ID use UNKN for unknown.
- Individual: The individual of the species, for example the first Tennessee Warbler would be TEWA 1 and the second TEWA 2
- Vocalization type: Whether the sound was a song, call or non-vocal
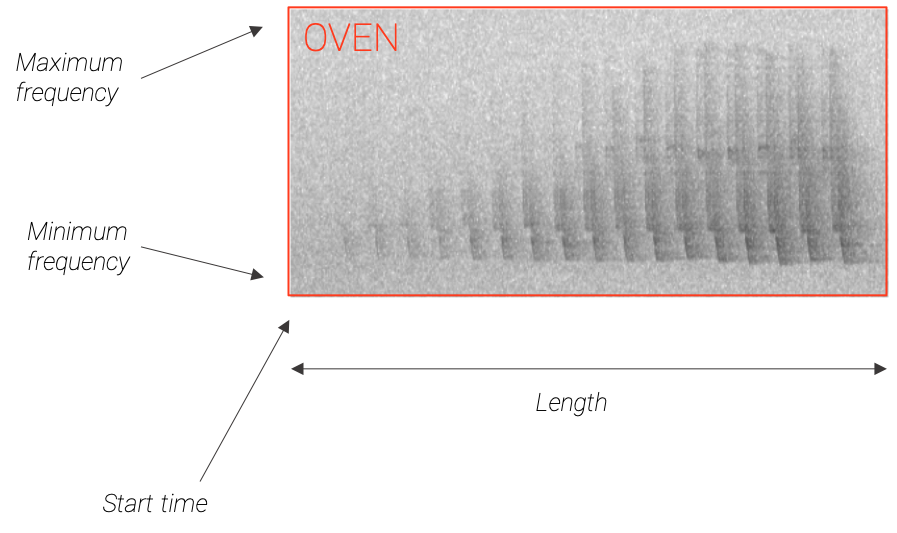
- Start time (seconds): The start time of the tag in seconds, for example if you heard the Ovenbird at 1:25 seconds in the recording, indicate 85.
- Length (seconds): The length of the tag - this field is optional and can be left blank. WildTrax will use the average size of the tag for that species / vocalization type combination to create a box.
- Mininimum frequency (kHz): The minimum frequency of the tag - this field is also optional
- Maximum frequency (kHz): The maximum frequency of the tag - this field is also optional
Click on the
 button and select
  . In the new pop-up window, select
  to select your tag data. When the file is uploaded the
  button will turn green. Click it and WildTrax will ensure that the data you're uploading fits the WildTrax standard. This may take a few minutes depending how large your file is.