Index
5.3 Image tagging methods
5.3.1 Overview
There are three primary functions for camera image tagging within WildTrax:
- Check that the location name on WildTrax matches the camera prefix
- Identify all species captured by the camera
- Determine the sampling effort of the camera by applying camera range tags where needed
All tasks with the status “Ready for Tagging” can be tagged. Unless you are the organization or project admin you can only tag the tasks that are assigned to you.
5.3.2 Validating location information
There are two ways you can validate the location of the image set - this is important as you'll want to be sure that this metadata is available and accurate.
This step is only applicable if a reference sign was used during field set-up and/or pick-up activities. If this does not apply, please continue to the Tagging images section. Double-checking the location information is an easy, but important task. It should be completed for all applicable tasks where reference signs are used.
Auto- and context-taggers are optional WildTrax processing tools that speed up tagging and reduce the overall number of images visible in the tagging screen. These tools automatically tag common species, such as cows, false-fire images, and staff setup images at the beginning of an image set. Images tagged by the auto- and context-taggers are automatically hidden from view. If staff setup photos are not visible on the first page of the tagging screen, the filter will need to be adjusted to complete the location information check. If this is the case, then:
- Click on a task to be taken to the tagging page. On the tagging page, click on the
 button, found to the right of the location name.
 - Uncheck the box that says “Exclude Auto-tagged”. This page will show all auto-tagged photos.
Review the initial staff setup photos and check the reference sign against the photo labels (if present) and the location name used in WildTrax. Notify the project admin if there are any mismatches.

5.3.3 Tagging images
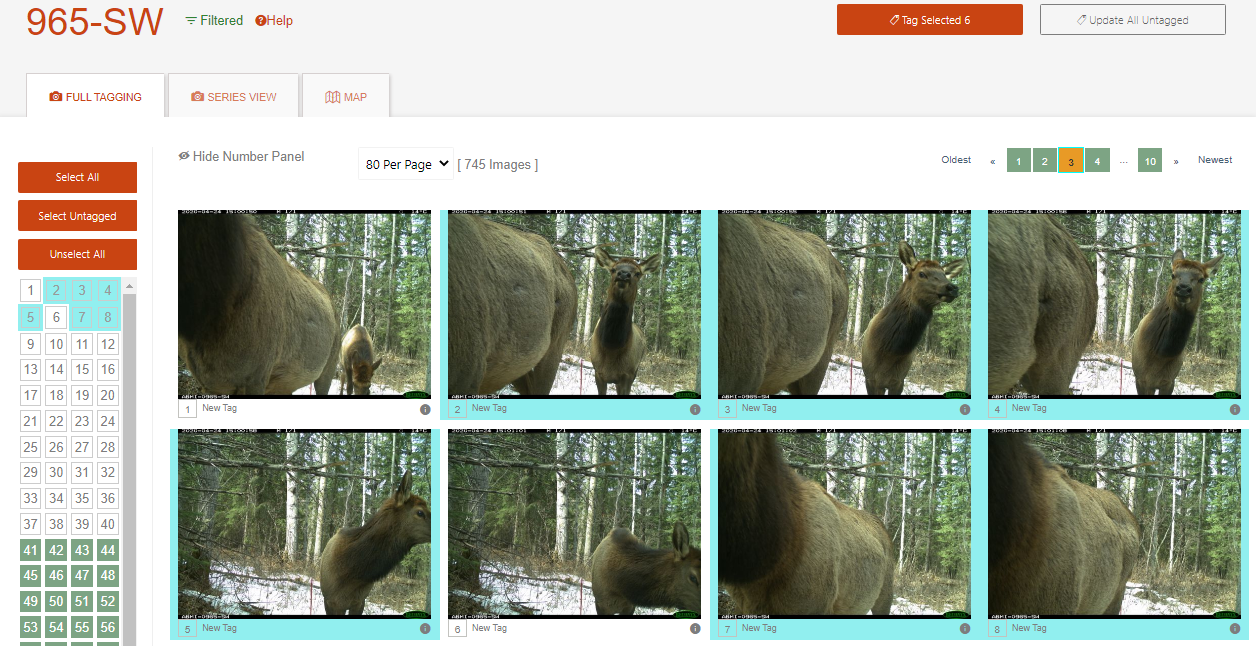
From the tagging screen, select one or more images for tagging. This can be done by:
- Clicking on the image to select it.
- Clicking and dragging your cursor over groups of images (initial click must be on an image).
- Using Shift, you can click on the first image; then, holding Shift, click on the last image to select all images in between.
- Using Ctrl, you can select multiple images that are not in a consecutive order. This includes being able to drag boxes around multiple subsets of images.
- Selecting images in the panel on the left-hand side of the screen. Note: Selected images will be highlighted in teal in the number panel. Press ESC at any time to deselect highlighted images.
- Apply tag(s) to selected image(s) using the tagging window. With image(s) selected, click on “Tag Selected X”, where X represents the number of images you have highlighted for tagging, and fill in applicable information.
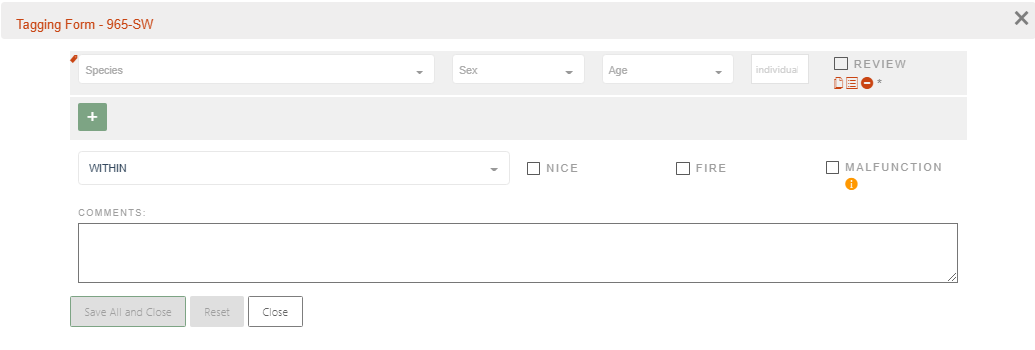
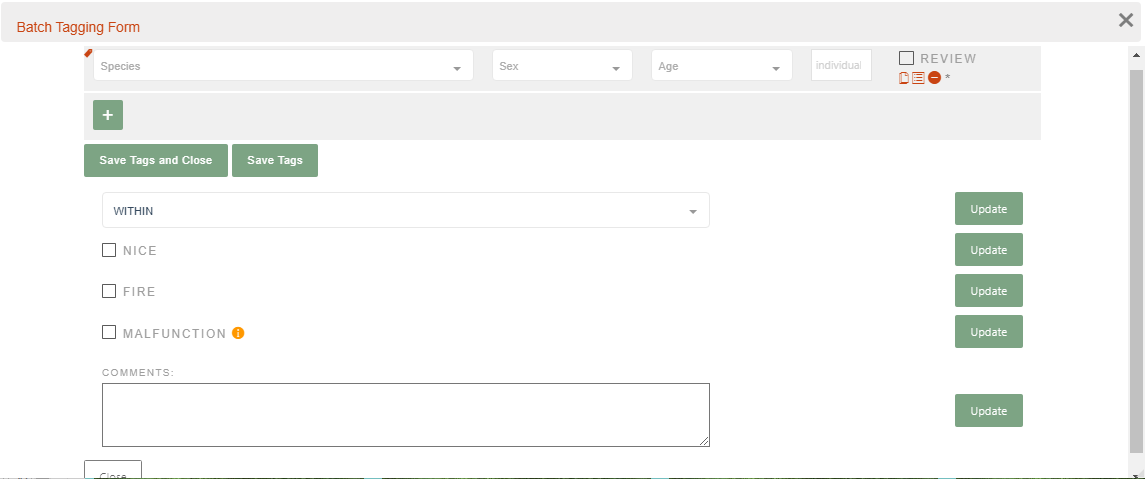
- The tagging form is slightly different when tagging a single image compared to a batch image tagging form:
-
Single image tagging form
-
Batch image tagging form
There are 4 key tagging scenarios you may encounter:
- If you select one or more images with a single individual of a species then a single tag is applied. Once the tag fields are completed, click “Save All and Close” to apply the tag.
- If you select a single image that contains > 1 individual of a single species, but age and/or sex differ among these individuals, then multiple tags are applied. Once you have completed the tag fields for the first individual, click
 to create a new tag for the next individual.
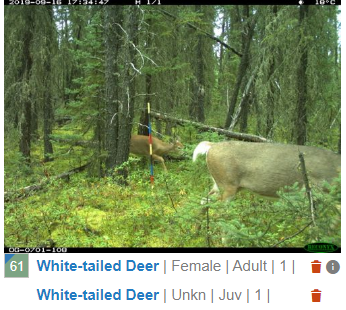
- Example: An image with a female deer with a fawn, or a male and female deer together. In this case you would create a unique tag for each individual.

- If you select a single image that contains > 1 species then multiple tags are applied. Once you have completed the tag fields for the first species/individual, click to create a new tag for the next species/individual.
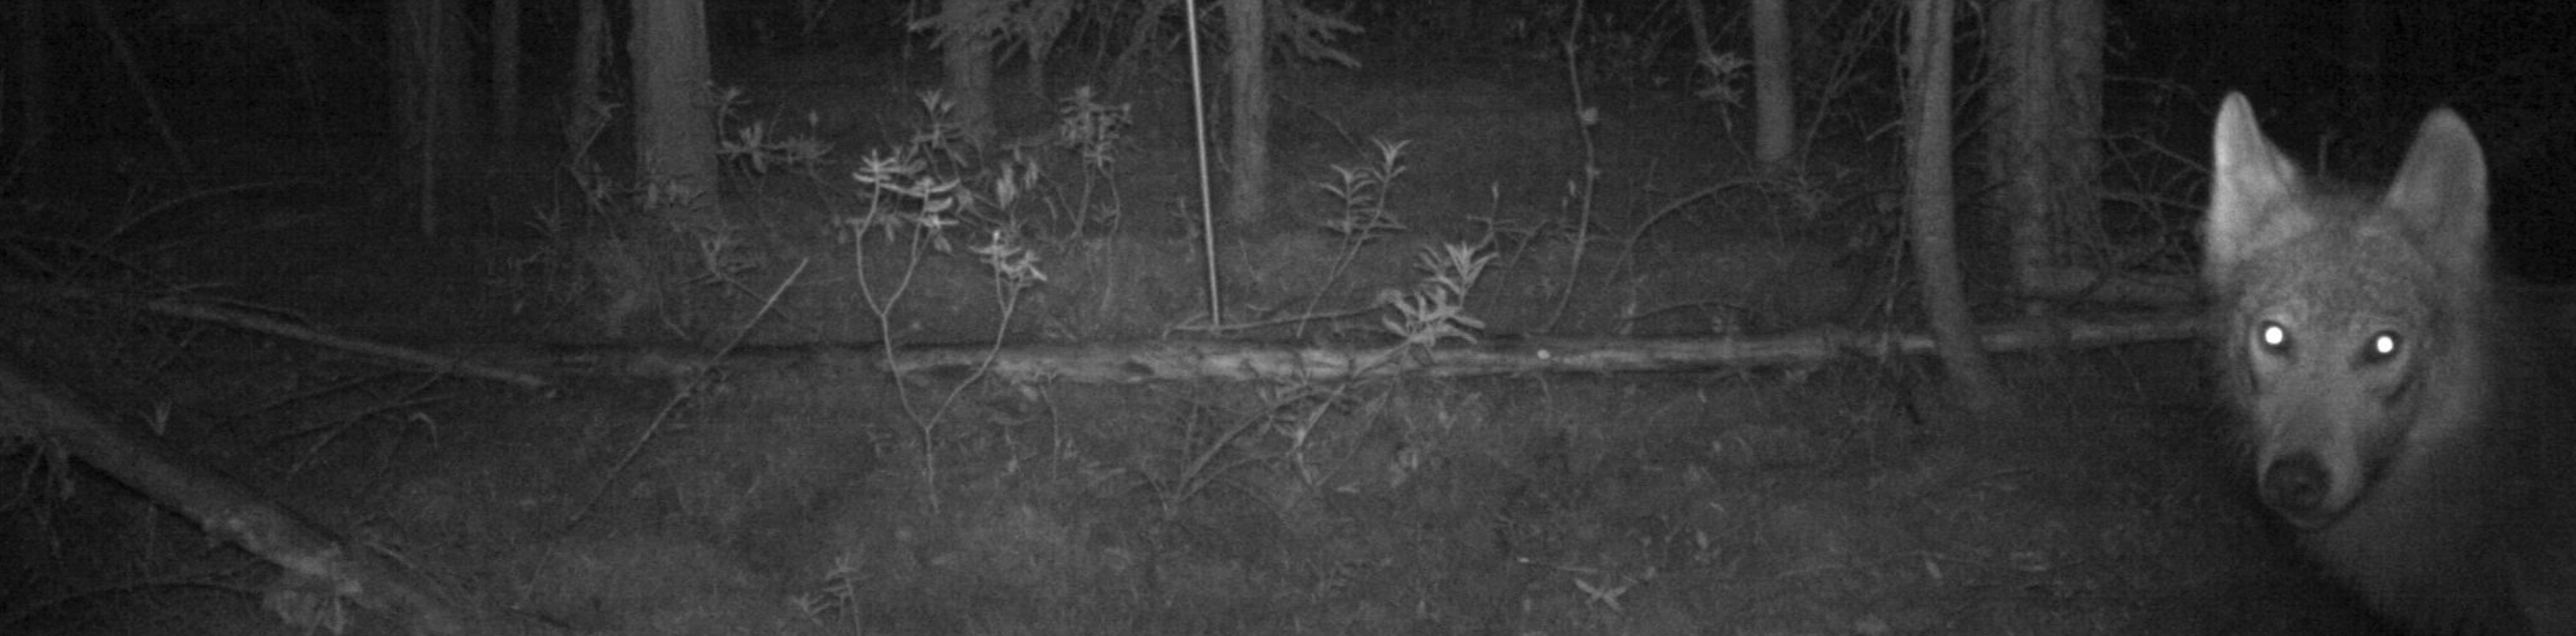
- Example: An image where a deer triggered the camera and a coyote was also captured in the background. In this case, you would create a tag for the deer and then create a tag for the coyote.
- If you select multiple images that contain > 1 individual of a single species and age and/or sex differ among these individuals then multiple tags are applied. Once you have completed the tag fields for the first individual, click to create a new tag for the next individual.
5.3.4 Species Identification
Species
This menu is divided into Mammals, Birds, and Human tags. Common species appear at the top of the drop-down menu to help with quick tagging.
Special species tags are also used: UNKNOWN: Is used if the individual in the image cannot be identified based on visible features. This is often used when the only images of an individual are blurs, blotches of fur, etc. NONE: Is used when the camera takes a motion-activated photo, but no individual is present in the photo. STAFF/SETUP: This tag is used for the series of photos taken while staff are setting up or taking down the camera.
Sex
This tag is applied when the sex of an individual can be identified. For example, ungulate species such as deer, elk, and moose can be identified to sex based on the presence of antlers, but antlers are not manifested year-round. Therefore, antler-less ungulates are only tagged as female between May 15 and October 1. Outside of these dates, the default of Unknown is used if antlers are not present. This field defaults to UNKN, and users have the option of leaving this field as UNKN or selecting VNA (variable not applicable) if they are not interested in using it. Some species, such as bears, are often photographed with their young. When an adult wild mammal is with young, it can be assumed to be Female and tagged as such.
Age
This tag defaults to Adult for wild mammals. The Age field for domestic animals, birds, and humans defaults to VNA. The juvenile tag is only used for an animal’s first summer where they have clear juvenile features, such as spots. The user can also select VNA if they are not interested in collecting information for this field.
5.3.5 Number of individuals
The number of individuals defaults to 1 for all wild animals. If the count is greater than one, then the number can be changed. Users can also input VNA if they do not want to collect information in this field. For domestic animals, birds, and humans the number of individuals defaults to VNA.
5.3.6 Applying camera field of view tags
These tags are only used when the camera field of view is changed compared to the set-up view (see Camera range criteria). During tagging, the “Out of Range” tag is applied to the first image where the area of view changes significantly for three or more hours. This image may be a motion or time-lapse image.
Examples of when to apply an out of range tag include:
- The camera was tilted past the acceptable limits (see camera range criteria)
- The lens was more than 50% covered (by snow, vegetation, fallen trees, etc.)
If the camera returns to the original view, a second “Out of Range” tag can be added to the image immediately before the view was fixed. It is not necessary to tag every image as out of range. WildTrax will complete the process automatically during field of view review. The “Field of View” drop-down menu in the tagging form defaults to “Within” as images are assumed to be within range.
5.3.7 Optional tags
Optional tags include:
- Review: Is applied when species ID is unclear and needs to be checked. Each species/individual tag in an image is associated with a review tag so it is clear which species/individual needs to be reviewed.
- Nice: Can be used to highlight high-quality (“nice”) images so they are easier to find at a later date.
- Fire: Is applied to images where the camera has clearly been triggered by fire. There may be animals present in these images or not.
- Malfunction: Is applied when the camera appears to not be working properly.
5.3.8 Tagging hints
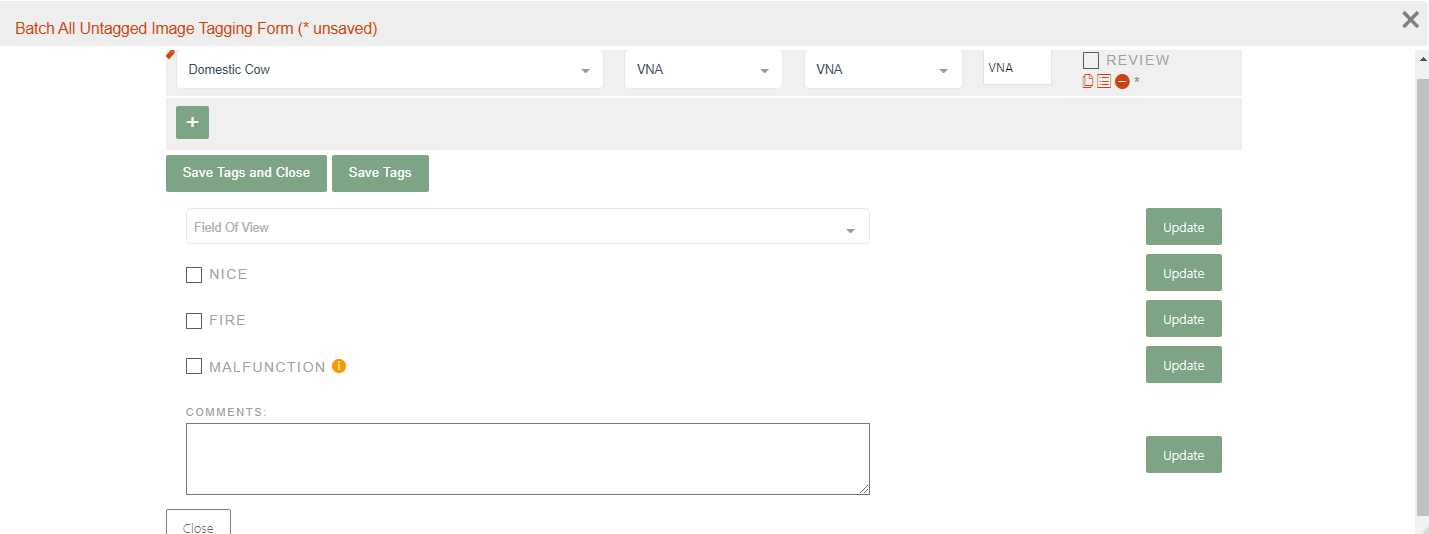
Images with abundant species that will all have the same tag, such as domestic cows, may be left untagged until the end. Once all other images in the image set (including NONE) have been tagged, you can select the  button, and enter the Domestic Cow tag in the tagging window. This will tag all remaining untagged images within that image set on all pages as Domestic Cow. Domestic Cow defaults to VNA for Sex and Age Class, and Number of Individuals; thus this tag can be applied to all images regardless of these variables. This is true for all domestic animals. This can also be done if many images have nothing in them and would be tagged as NONE. However, cannot be used for wild species where the age/sex variable, or number of individuals may vary.

5.3.9 Field of view review
A field of view review is completed only if an “Out of Range” tag is applied during the tagging process, and after all images in an image set have been tagged. The goal is to find out exactly when the camera’s view changed during the deployment period using the previously applied “Out of Range” tag(s). In this step, images are displayed in reverse chronological order (i.e., last photo taken to first photo taken), and all images are included (i.e., motion-triggered, time-lapsed, auto-tagged) in order to inspect the field of view.
5.3.9.1 Key steps
It is easiest to think of the “Out of Range” tags applied during the tagging process  as bookmarks, which are used to find the exact time a camera field of view changed in the Field of View tab.
- Locate the “Out of Range” tag(s) applied during the tagging process Click the three dots between the page numbers to determine which page has a yellow triangle across it.
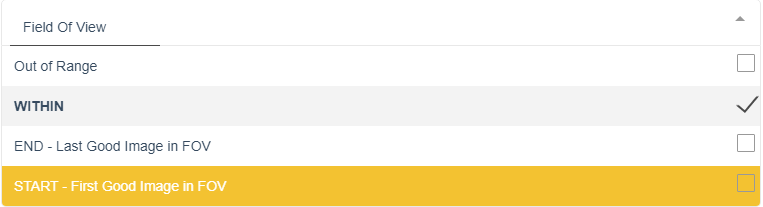
- Click on the page with the yellow triangle and locate the last image taken in the field of view. The last good image will occur to the right of the image marked “Out of Range” because images are ordered from last to first taken. Select the last good image, open the tagging form, and select the “END - Last good image in FOV” tag from the Field of View drop-down menu. If the last good image has no associated species tag, you will need to create one.

5.3.9.2 When to use END/START tags
The END/START tags define the observation period and sampling effort for a deployment. Knowing when to apply them can be tricky, but following these instructions will help you use them correctly.
- Apply: When the camera is out of range for more than 3 hours in the middle of the season. The END tag should be applied to the last good photo taken before the camera stopped working properly. The START tag can be applied to the first good image if the camera pops back into position by itself (as occasionally happens when cows or bears lean against the camera post or tree). Discretion is used where (e.g.) cattle are leaning on a post and making the camera go in and out of position repeatedly. In such cases, the camera is said to be not working properly the whole time this is happening. Therefore, an END tag should be applied to the last good image before a cow started leaning on the post and a START tag should be applied if the camera pops back into acceptable position after the cow leaves.
- Don't apply: A START tag at the beginning of an image set to indicate that the camera has been successfully set up. If the camera is out of range for less than 3 hours in the middle of the season.
5.3.9.3 Camera range criteria
This section shows the changes needed for a camera’s view to be considered out of range. When this happens, the observation period ends for the camera. It is important to use the range tags correctly. These tags allow for each camera’s sampling effort to be estimated. A camera’s view can go out of range due to major changes in the roll, pitch, and yaw of the camera.
An END tag is used on the last good image before the view changed sufficiently compared to the set-up images. If the camera angle later moves back into range, you can restart the observation period with a START tag. Note that the START and END tags are only used if the view changes compared to the set-up images.
The following are defined limits for changes to the camera’s view after set-up:
- Roll: The observation period will end if the horizon in an image is tilted more than 30 degrees from level. Note: The lines in the image below show the angle to which the horizon would need to rotate to be considered out of range.
- Pitch: The observation period will end if the camera angle is moved upwards or downwards such that the pole (if used) is either out of view beyond the bottom of the image or above the center of the image.
- Yaw: The observation period will end if the bottom of the pole (if used) is out of view beyond the right or left side of the image.